
Another of my “posts to self” to help me first of all understand why I’ve set my camera up the way I have, but secondly to keep a record of those settings when I set them up initially.
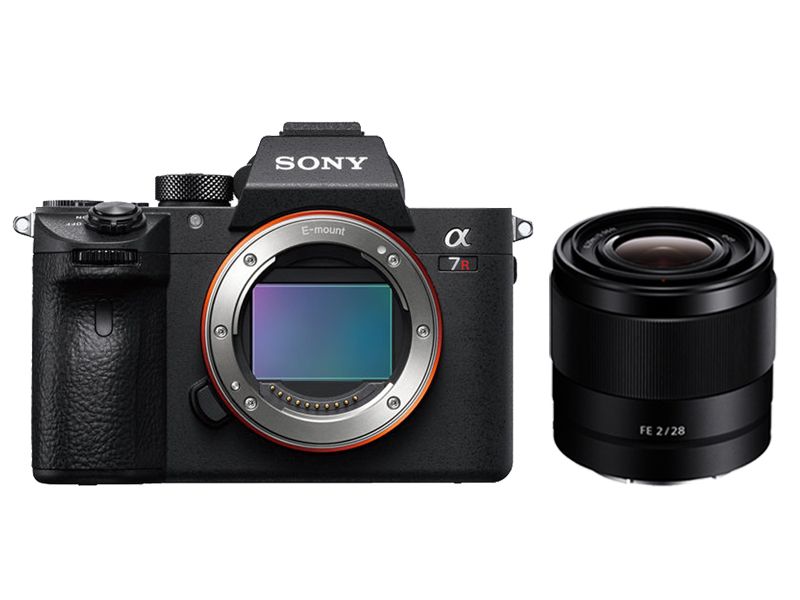
The Sony A7r III has an “interesting” menu system – let’s describe it that way. It’s getting much better, and as I’ve been a Minolta, then Sony shooter for quite a long time now, I’ve grown up with it and have adapted as Sony has adapted.
First the Custom Keys …
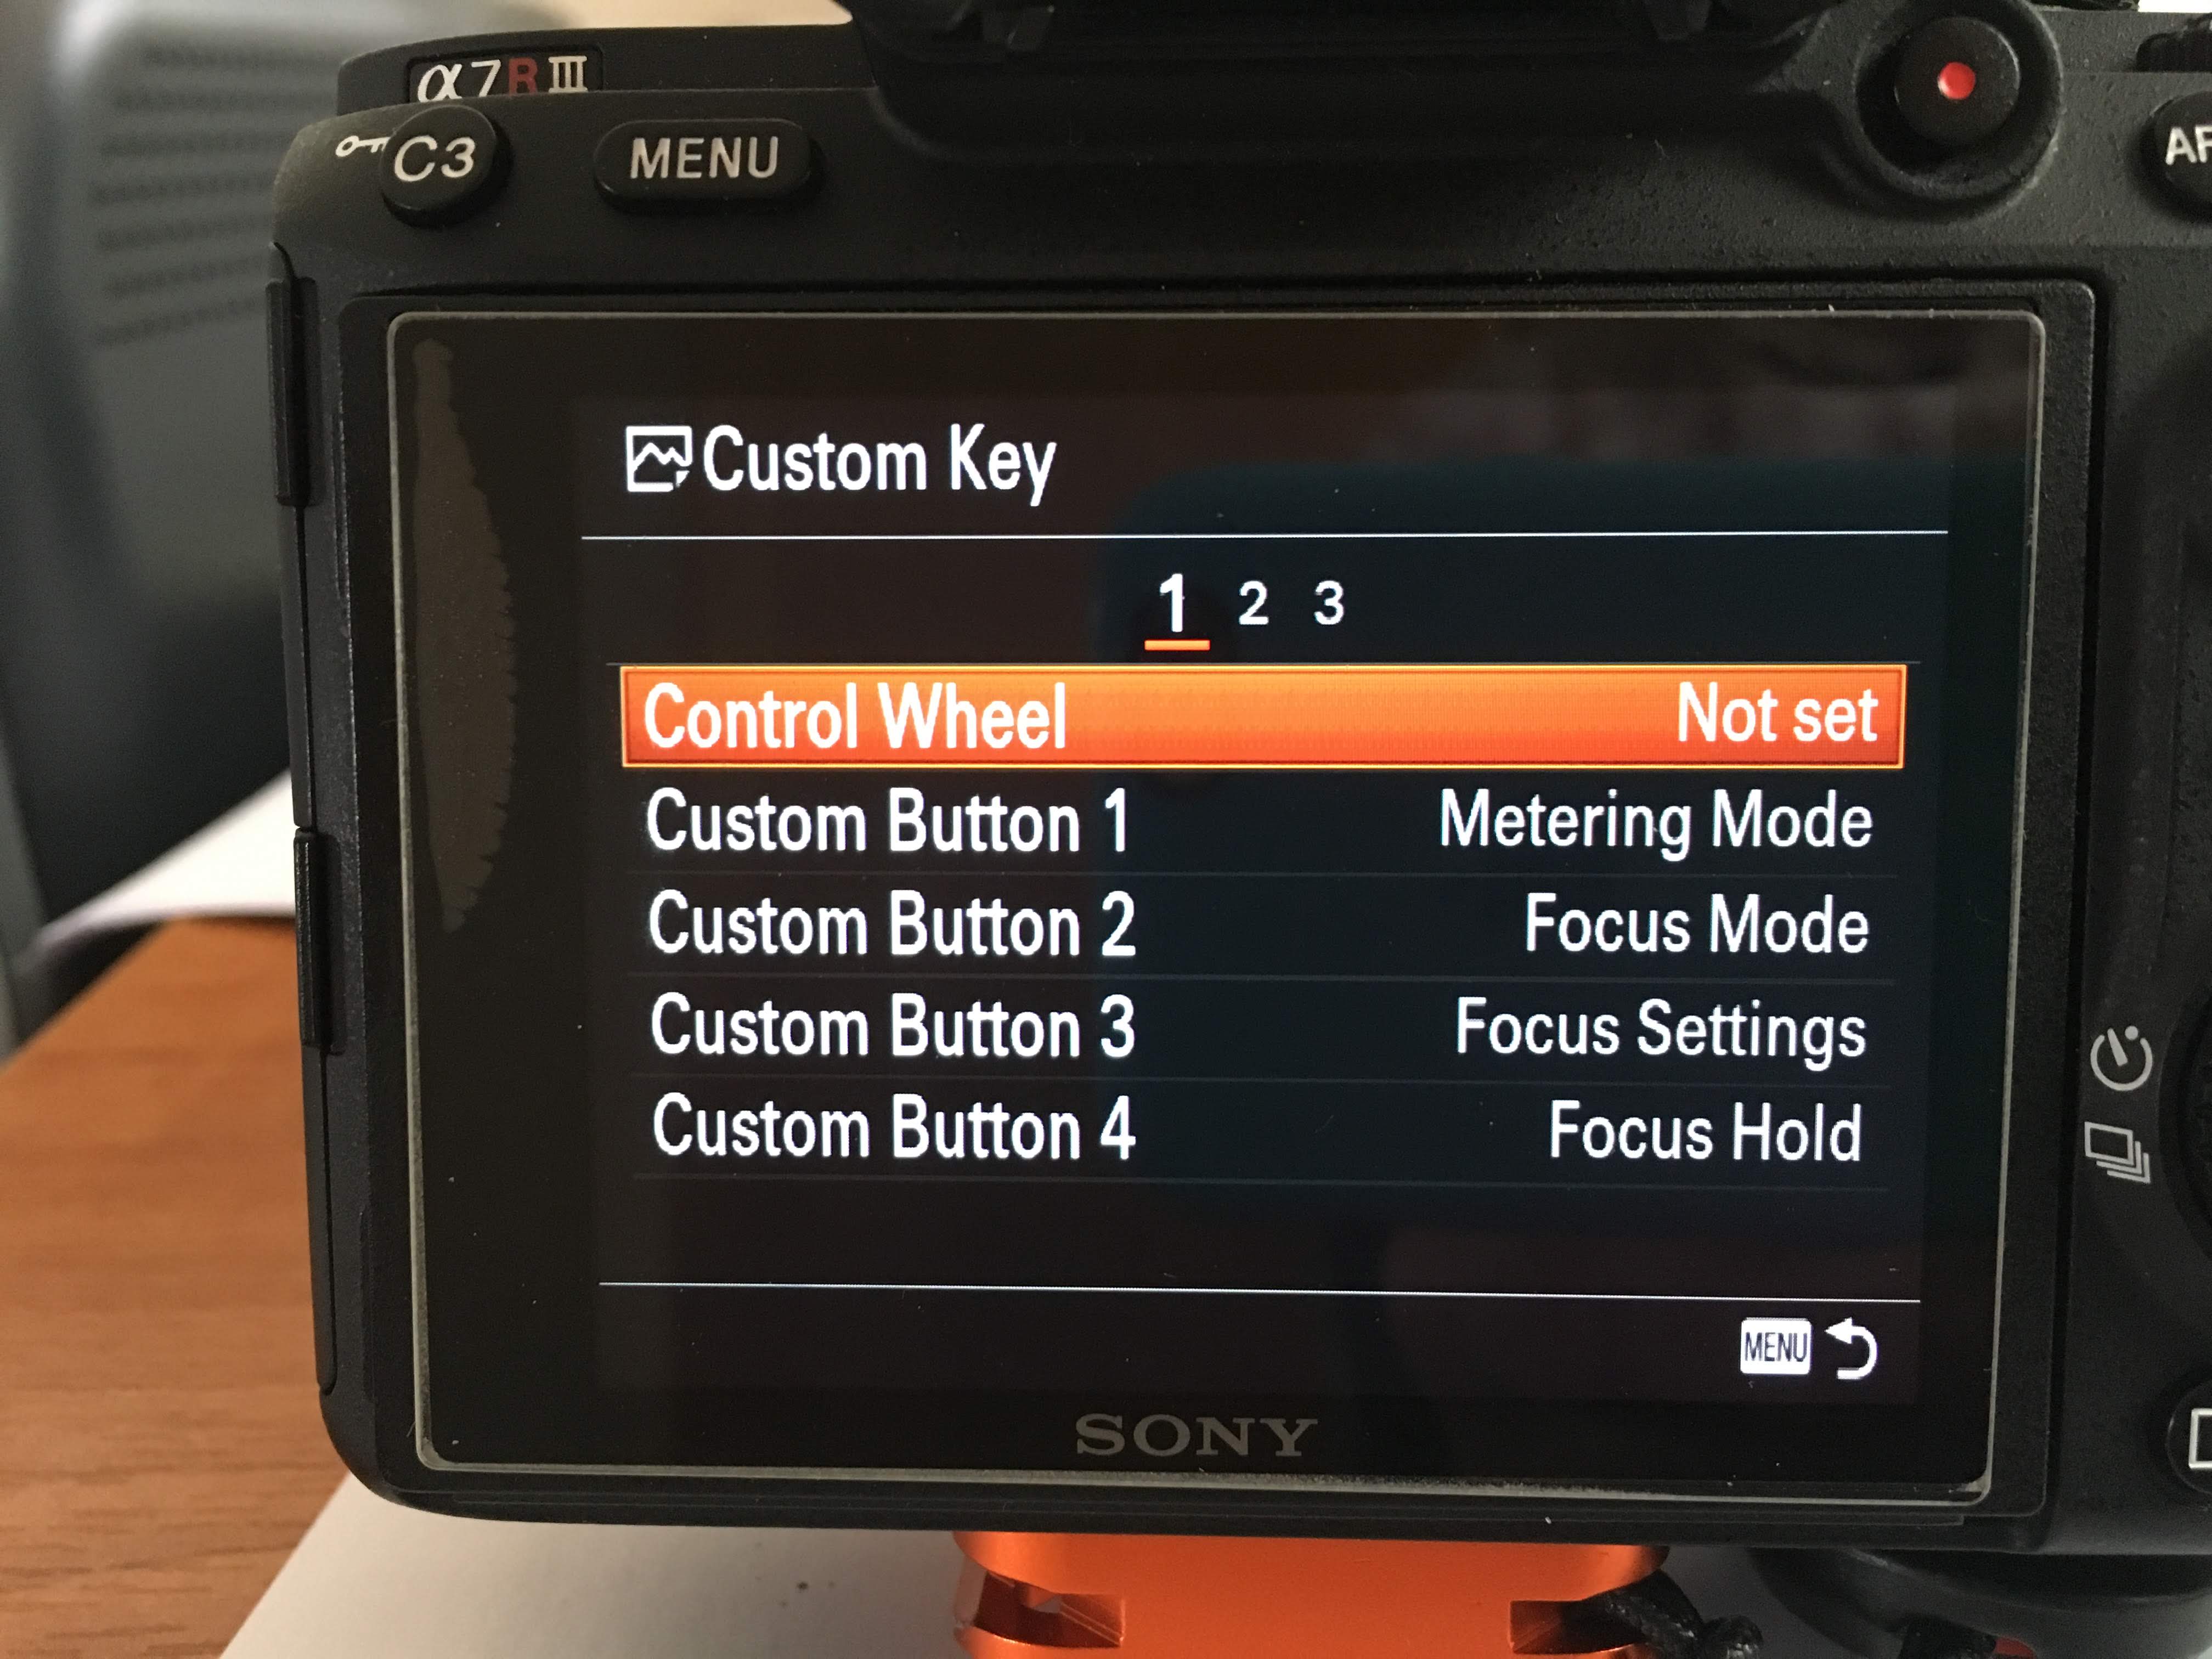
Rotation of the Control Wheel is not assigned to any function; this is to allow it to be used as a selector with the other functions available on the Control Wheel (see next section).
C1 is set to Metering Mode – multi; centre; spot; entire screen average; and highlight.
C2 is set to Focus Mode – single-shot AF; automatic AF; continuous AF; DMF (direct manual focus); and Manual Focus.
C3 is set to Focus Settings – which are changed by rotating the Control Wheel, and in some modes the front and back wheels on the top of the camera.
C4 (trash) is set to Focus Hold – which allows the focus point to be selected (AF, or MF) and then held whilst the composition is re-framed.
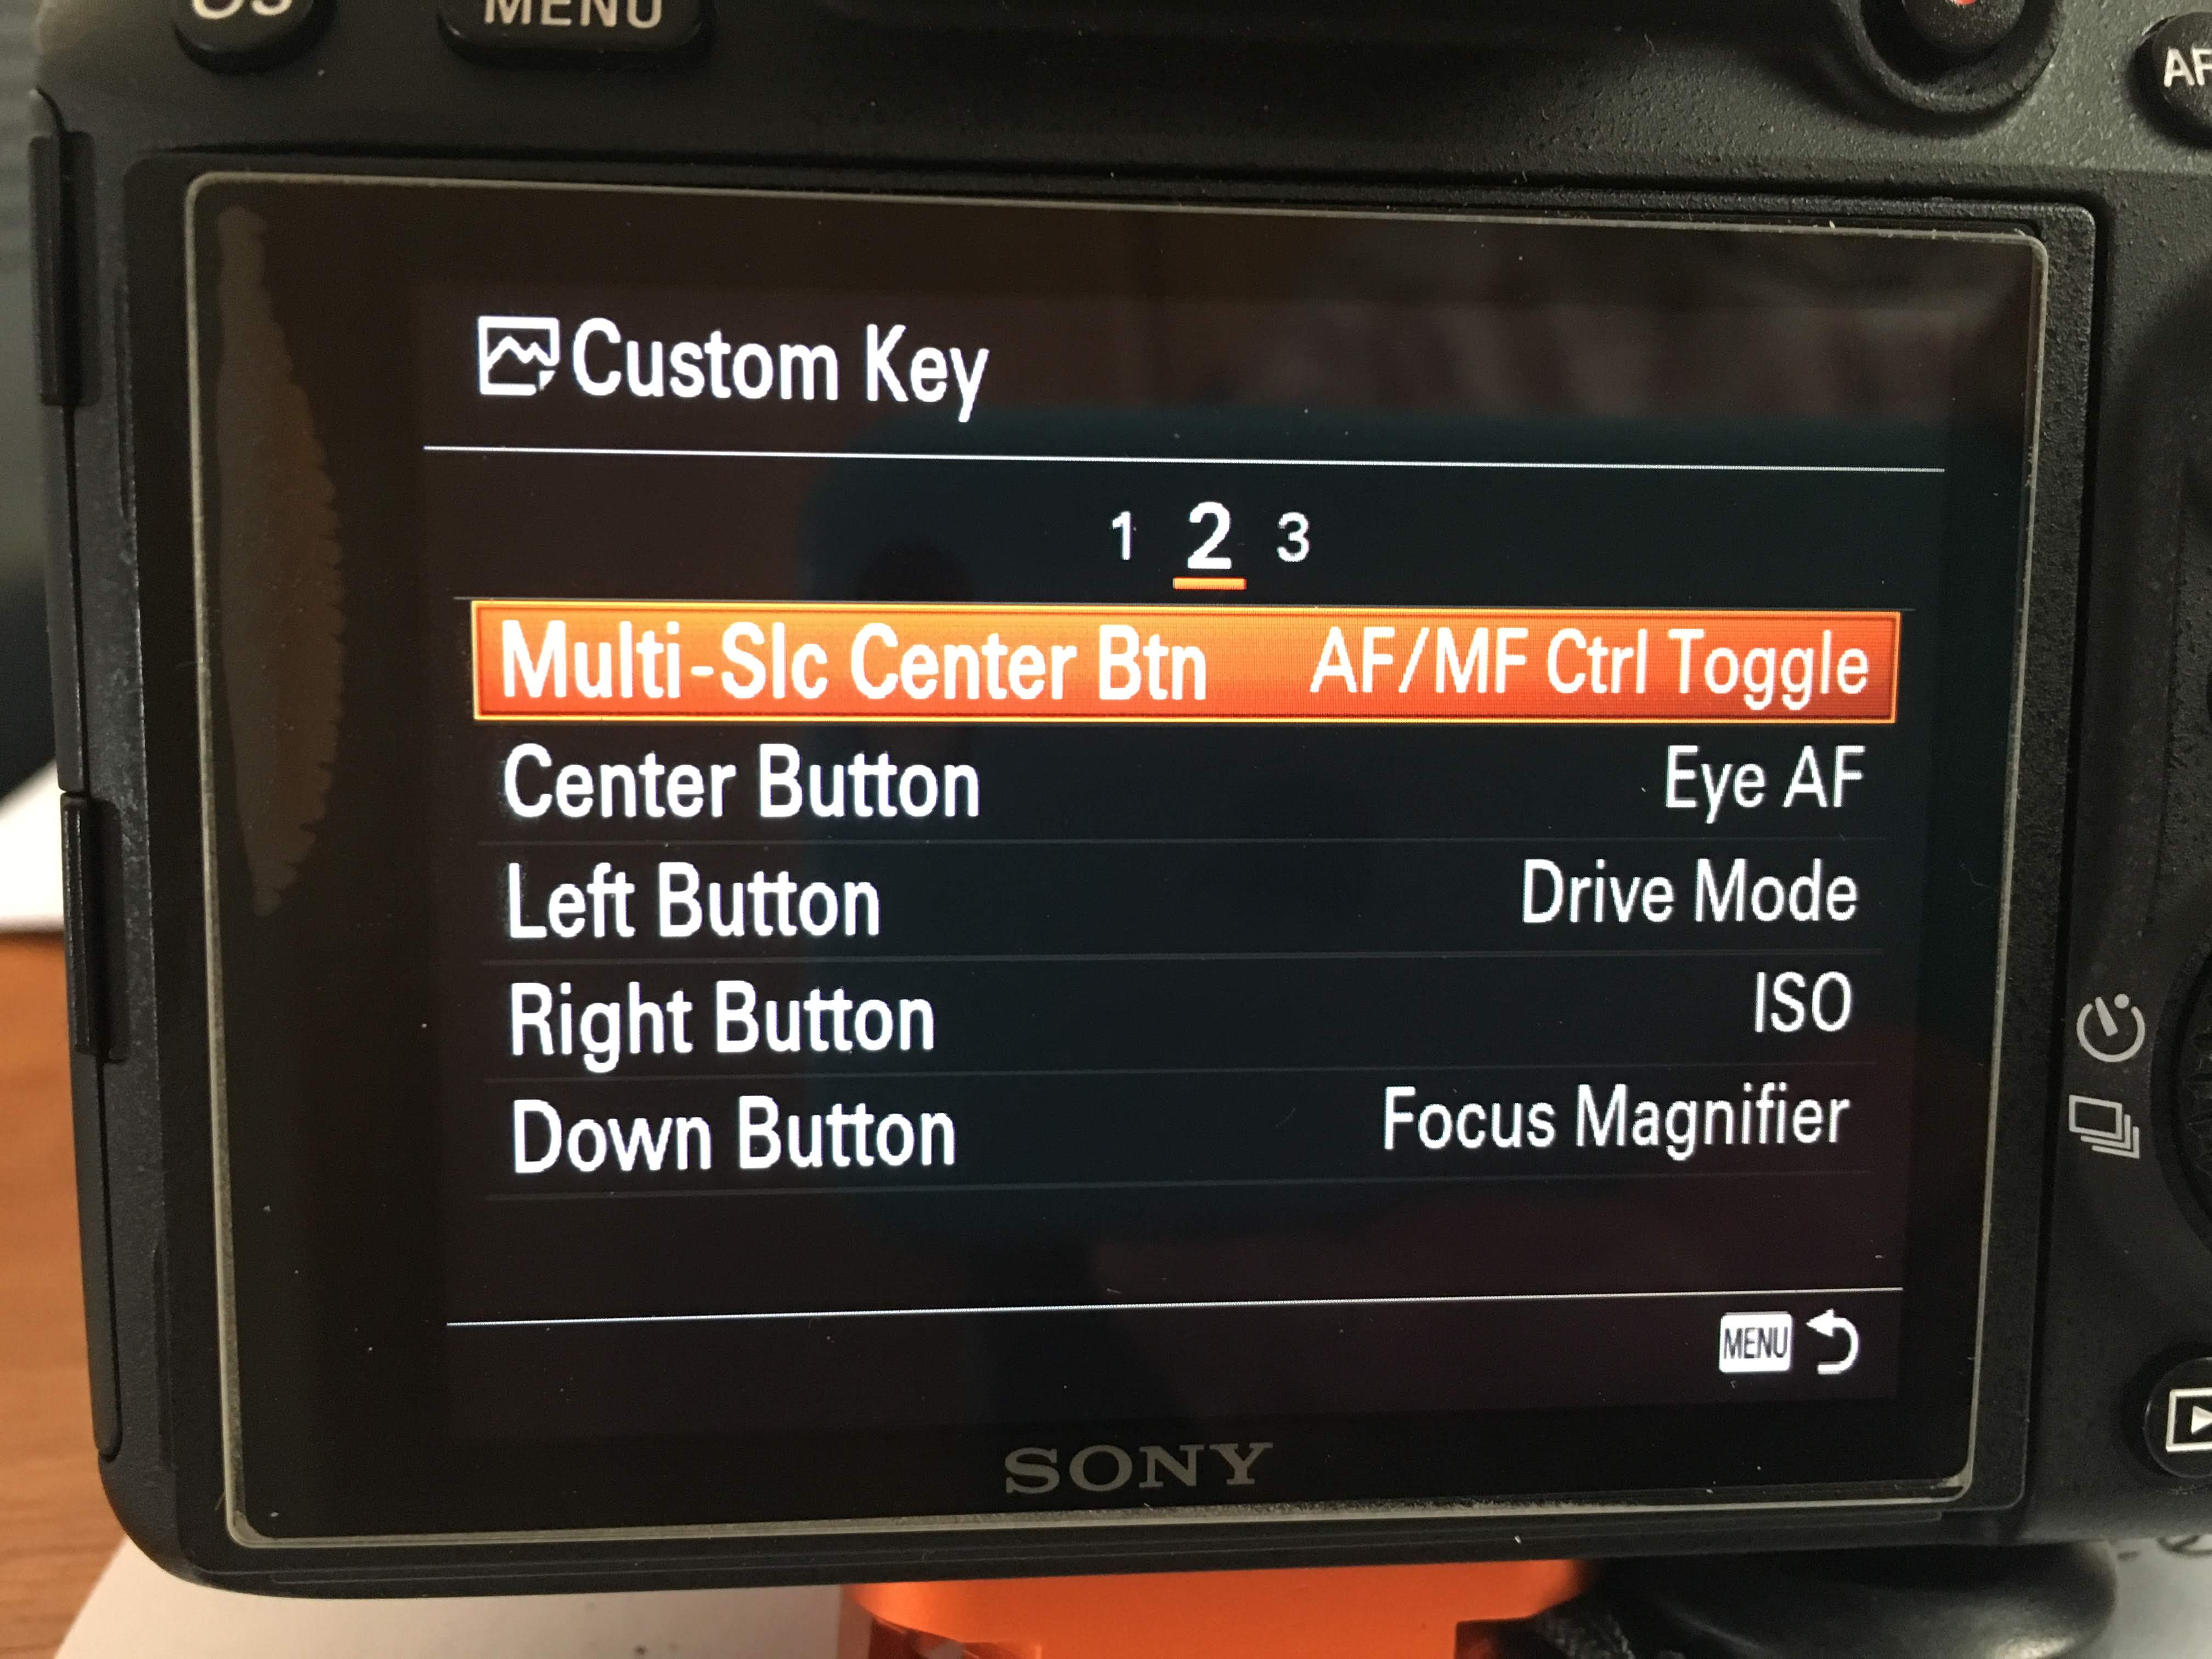
Pressing the Multi-Select Centre Button allows you to switch between Auto Focus and Manual Focus. In other situations the button is a joystick to move around the eyepiece or display screen when using certain functions.
Pressing the Centre Button of the Control Wheel will select Eye AF, where the auto focus searches for an eye to focus on.
Pressing the Left-side of the Control Wheel will enable Drive Mode to be selected – Single; Continuous; Self-timer; Self-timer (Continuous); Continuous Bracket (EV – 3 images); Single Bracket (EV – 5 images); White Balance Bracket; and DRO Bracket. The last two won’t be used. This is the default setting.
Pressing the Right-side of the Control Wheel will allow ISO to be selected (incl. setting for Auto ISO). This is the default setting.
Pressing the Down Button will enable the Focus Magnifier in Manual Focussing Mode. [I’ve also set Manual Focus Assist to On, so this button is probably superfluous and could be re-assigned, however it is quite useful in Auto focus to just check on the focussing on the main subject.] Pressing the Up Button will cycle through the Display options (menu choice) for the eyepiece and display screen – this is not customisable.

The AEL Button is set to AEL hold to lock exposure.
The AF-ON Button is set to AF On which means that the auto-focus process is started independently from the pressing of the shutter. If you’ve disengaged auto focus from shutter release (to use back button focus), this is how you’ll need to auto focus the camera/lens.
The Focus Hold Button is present on some of the lenses and is set to Eye AF – the default is Focus Hold (not used yet).
Next the Function Menu – reached by pressing the Fn button. It has two rows of options, set from two screens. First the Upper Row …
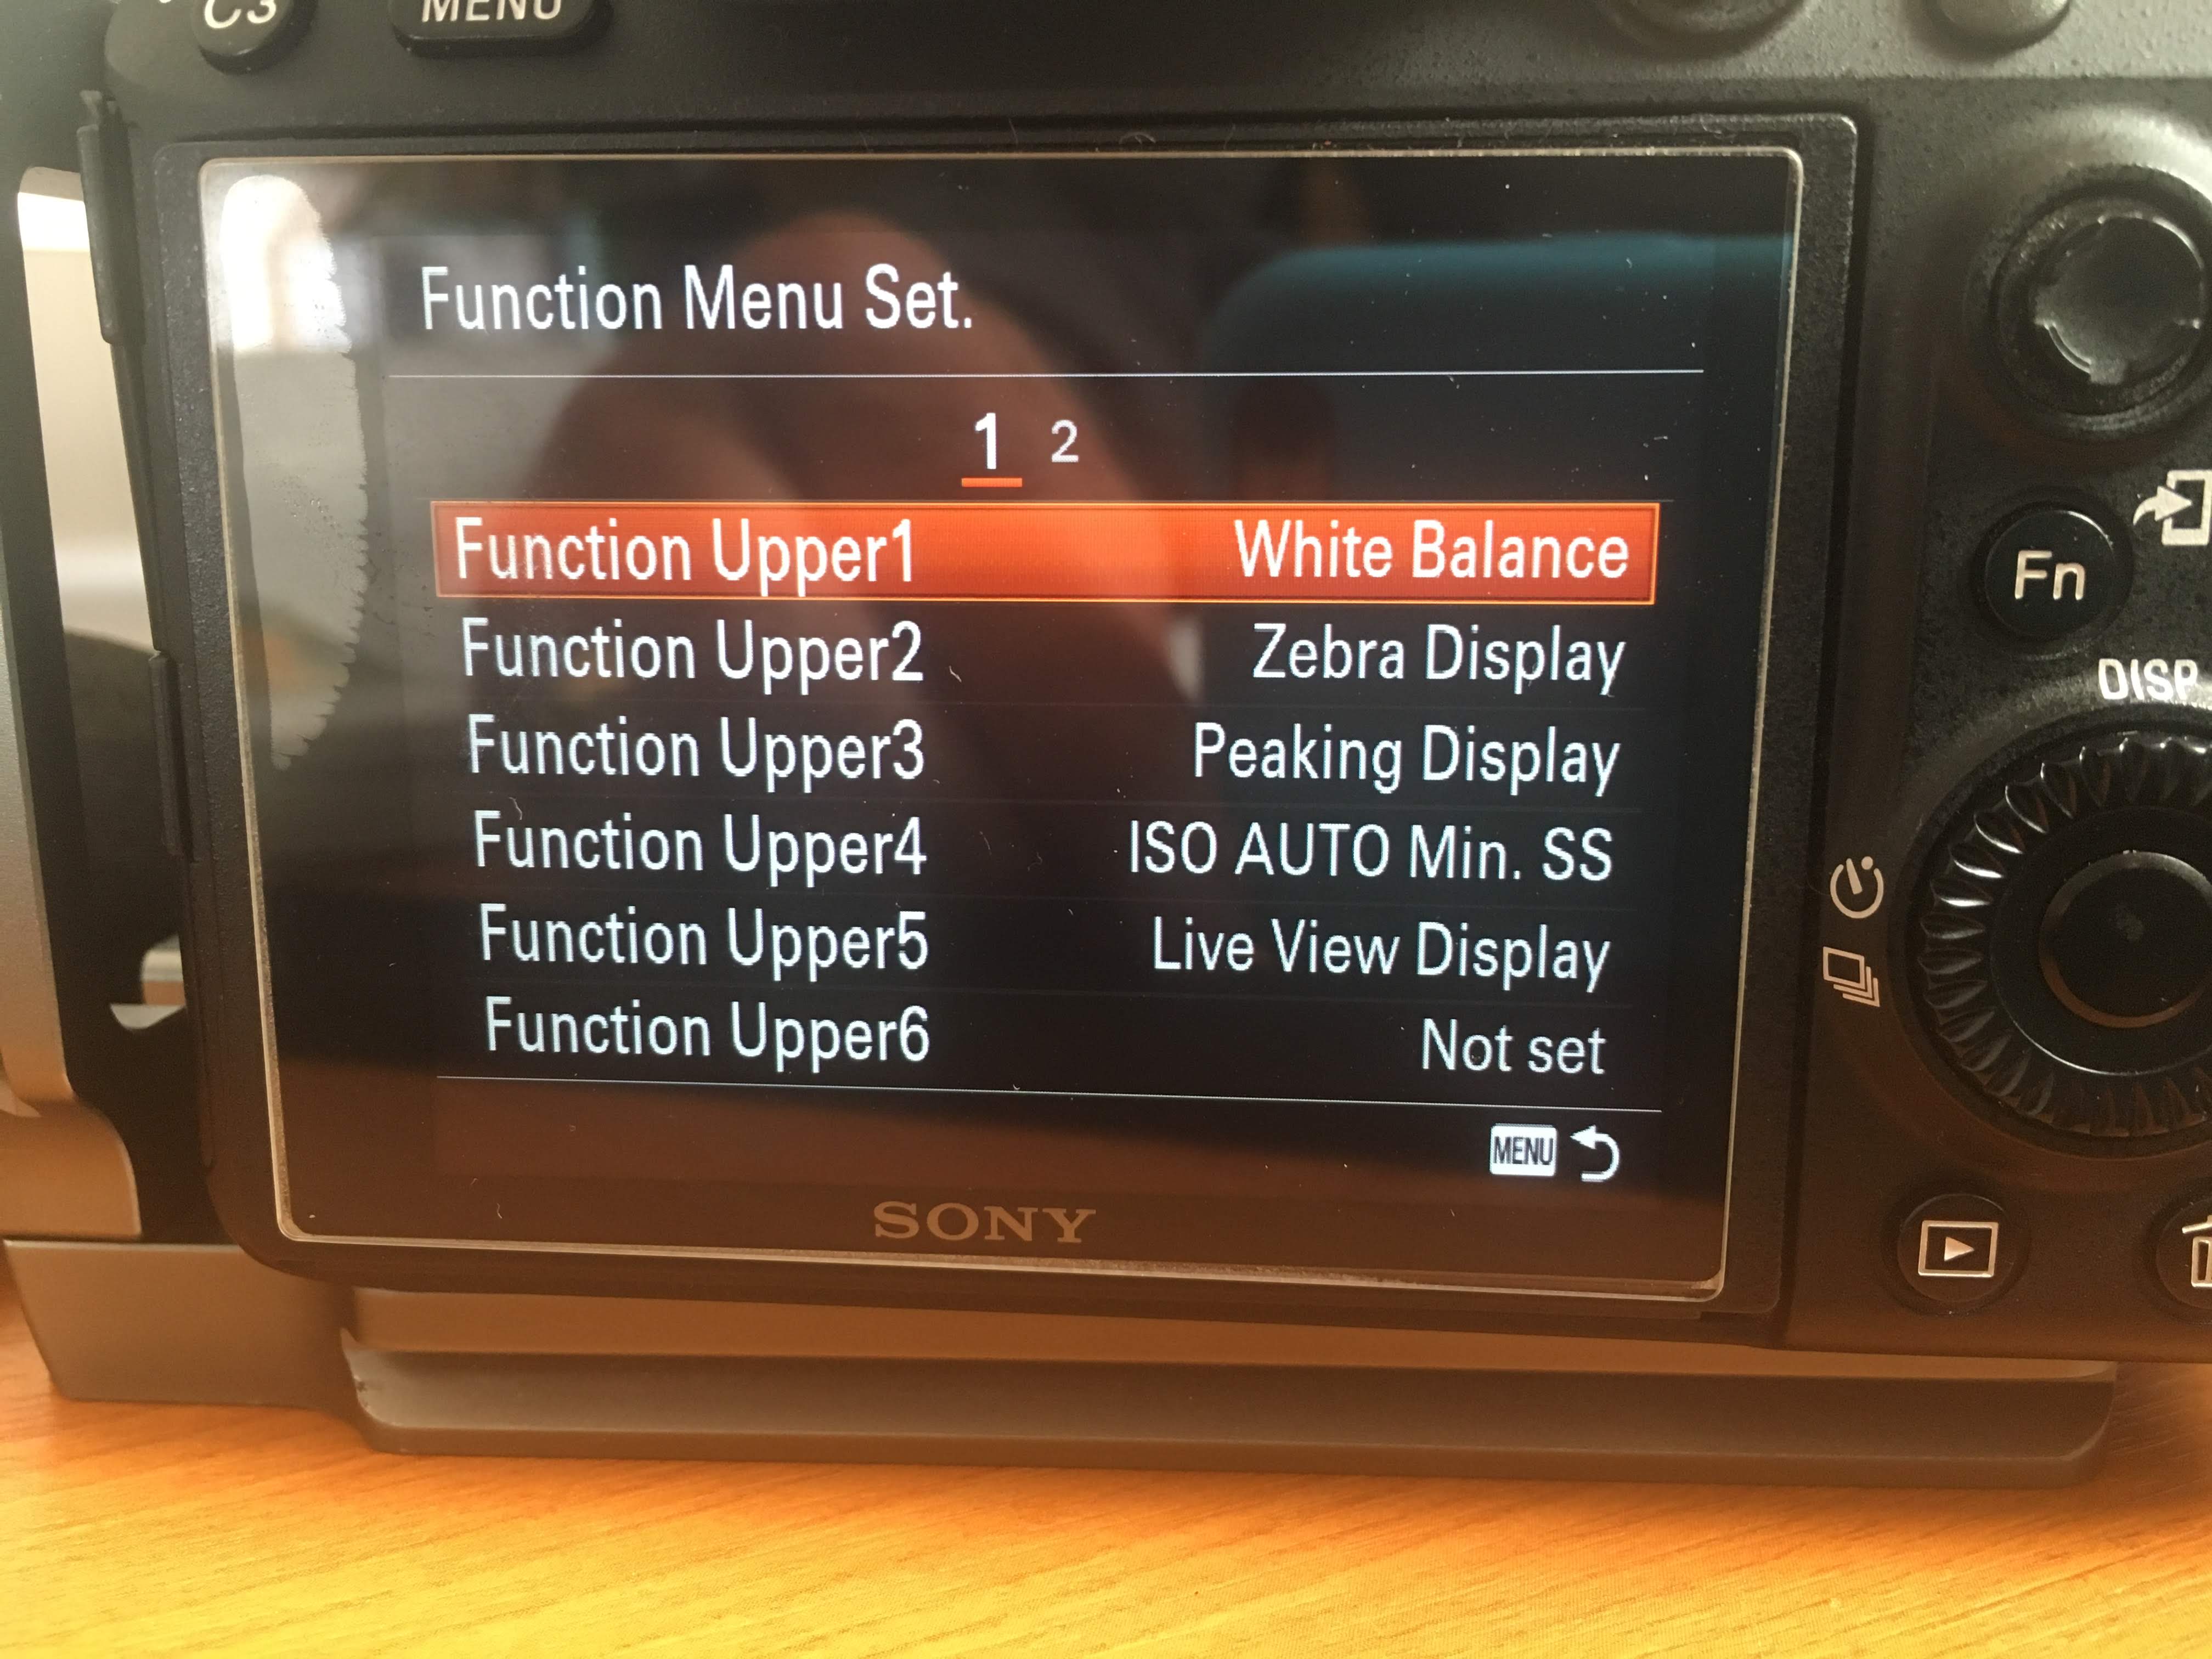
White Balance – my default setting is Daylight – a fixed Kelvin value of 5200. I use this as it’s a known quantity. I can change the white balance very easily in Lightroom, or could apply some of the Profiles now available.
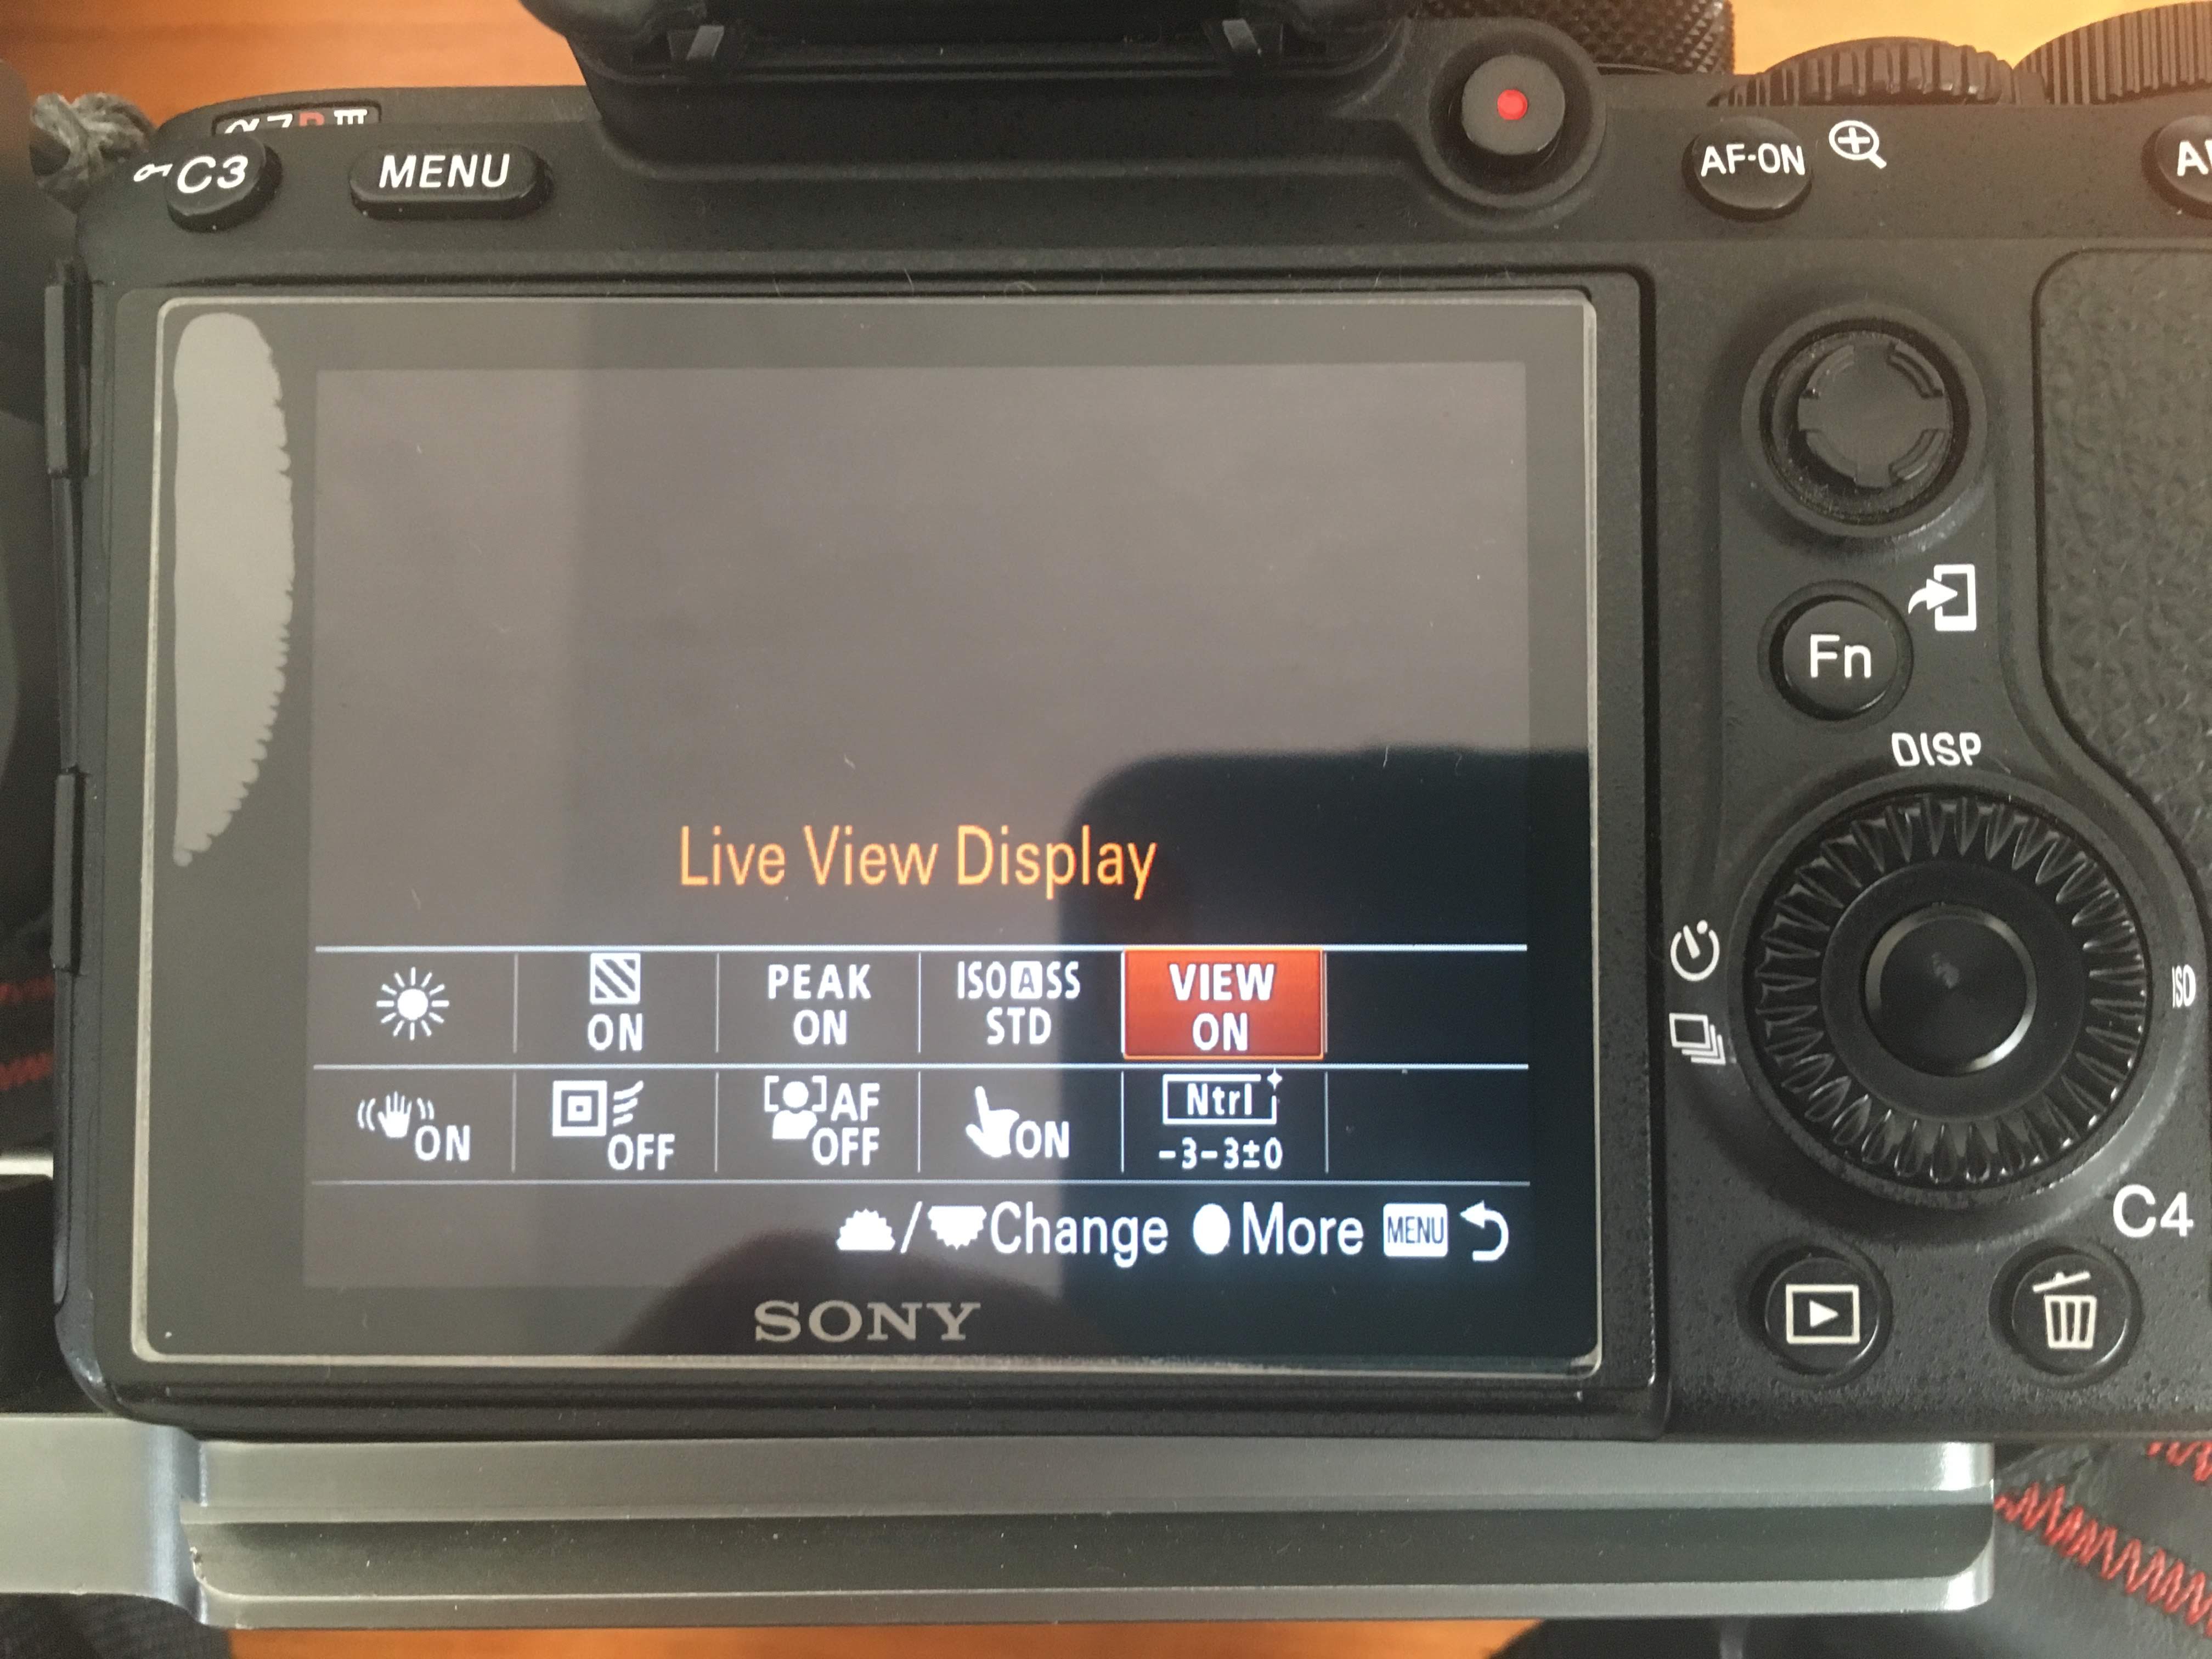
Zebra Display – set to On, so that I can see the effect of applying Exposure Compensation (EV) to reduce highlights.
Peaking Display – set to On, so that in Manual Focus, or DMF mode, you can see the sharp edges of what is in focus. You might wish to set Peaking Level to Lo , so that you don’t have too much “noise” on the display/eyepiece. I’ve chosen a Peaking Colour of Red, but Yellow and White are alternatives.
ISO AUTO Min. SS – set to Standard which ensures that when the camera detects the current focal length/zoom setting and selects a minimum shutter speed, it takes into account the effect the focal length has in magnifying the degree of blur. That is a 200mm lens calls for a higher shutter speed than a 50mm lens. [Alternatives would be Faster/Fast and Slow/Slower.] This ensures that the risk of introducing blur when hand-holding is reduced.
Live View Display – set to On partnered by Creative Style set to Neutral. This is to counteract the fact that the Live View Display shows a JPEG rendition of the image, and so with Creative Style set to Neutral, with Exposure and Saturation wound down to -3, the highlights won’t be blown and I almost have a guaranteed “expose to the right” histogram with as many tones represented as possible.
Not set.
In the Lower Row …
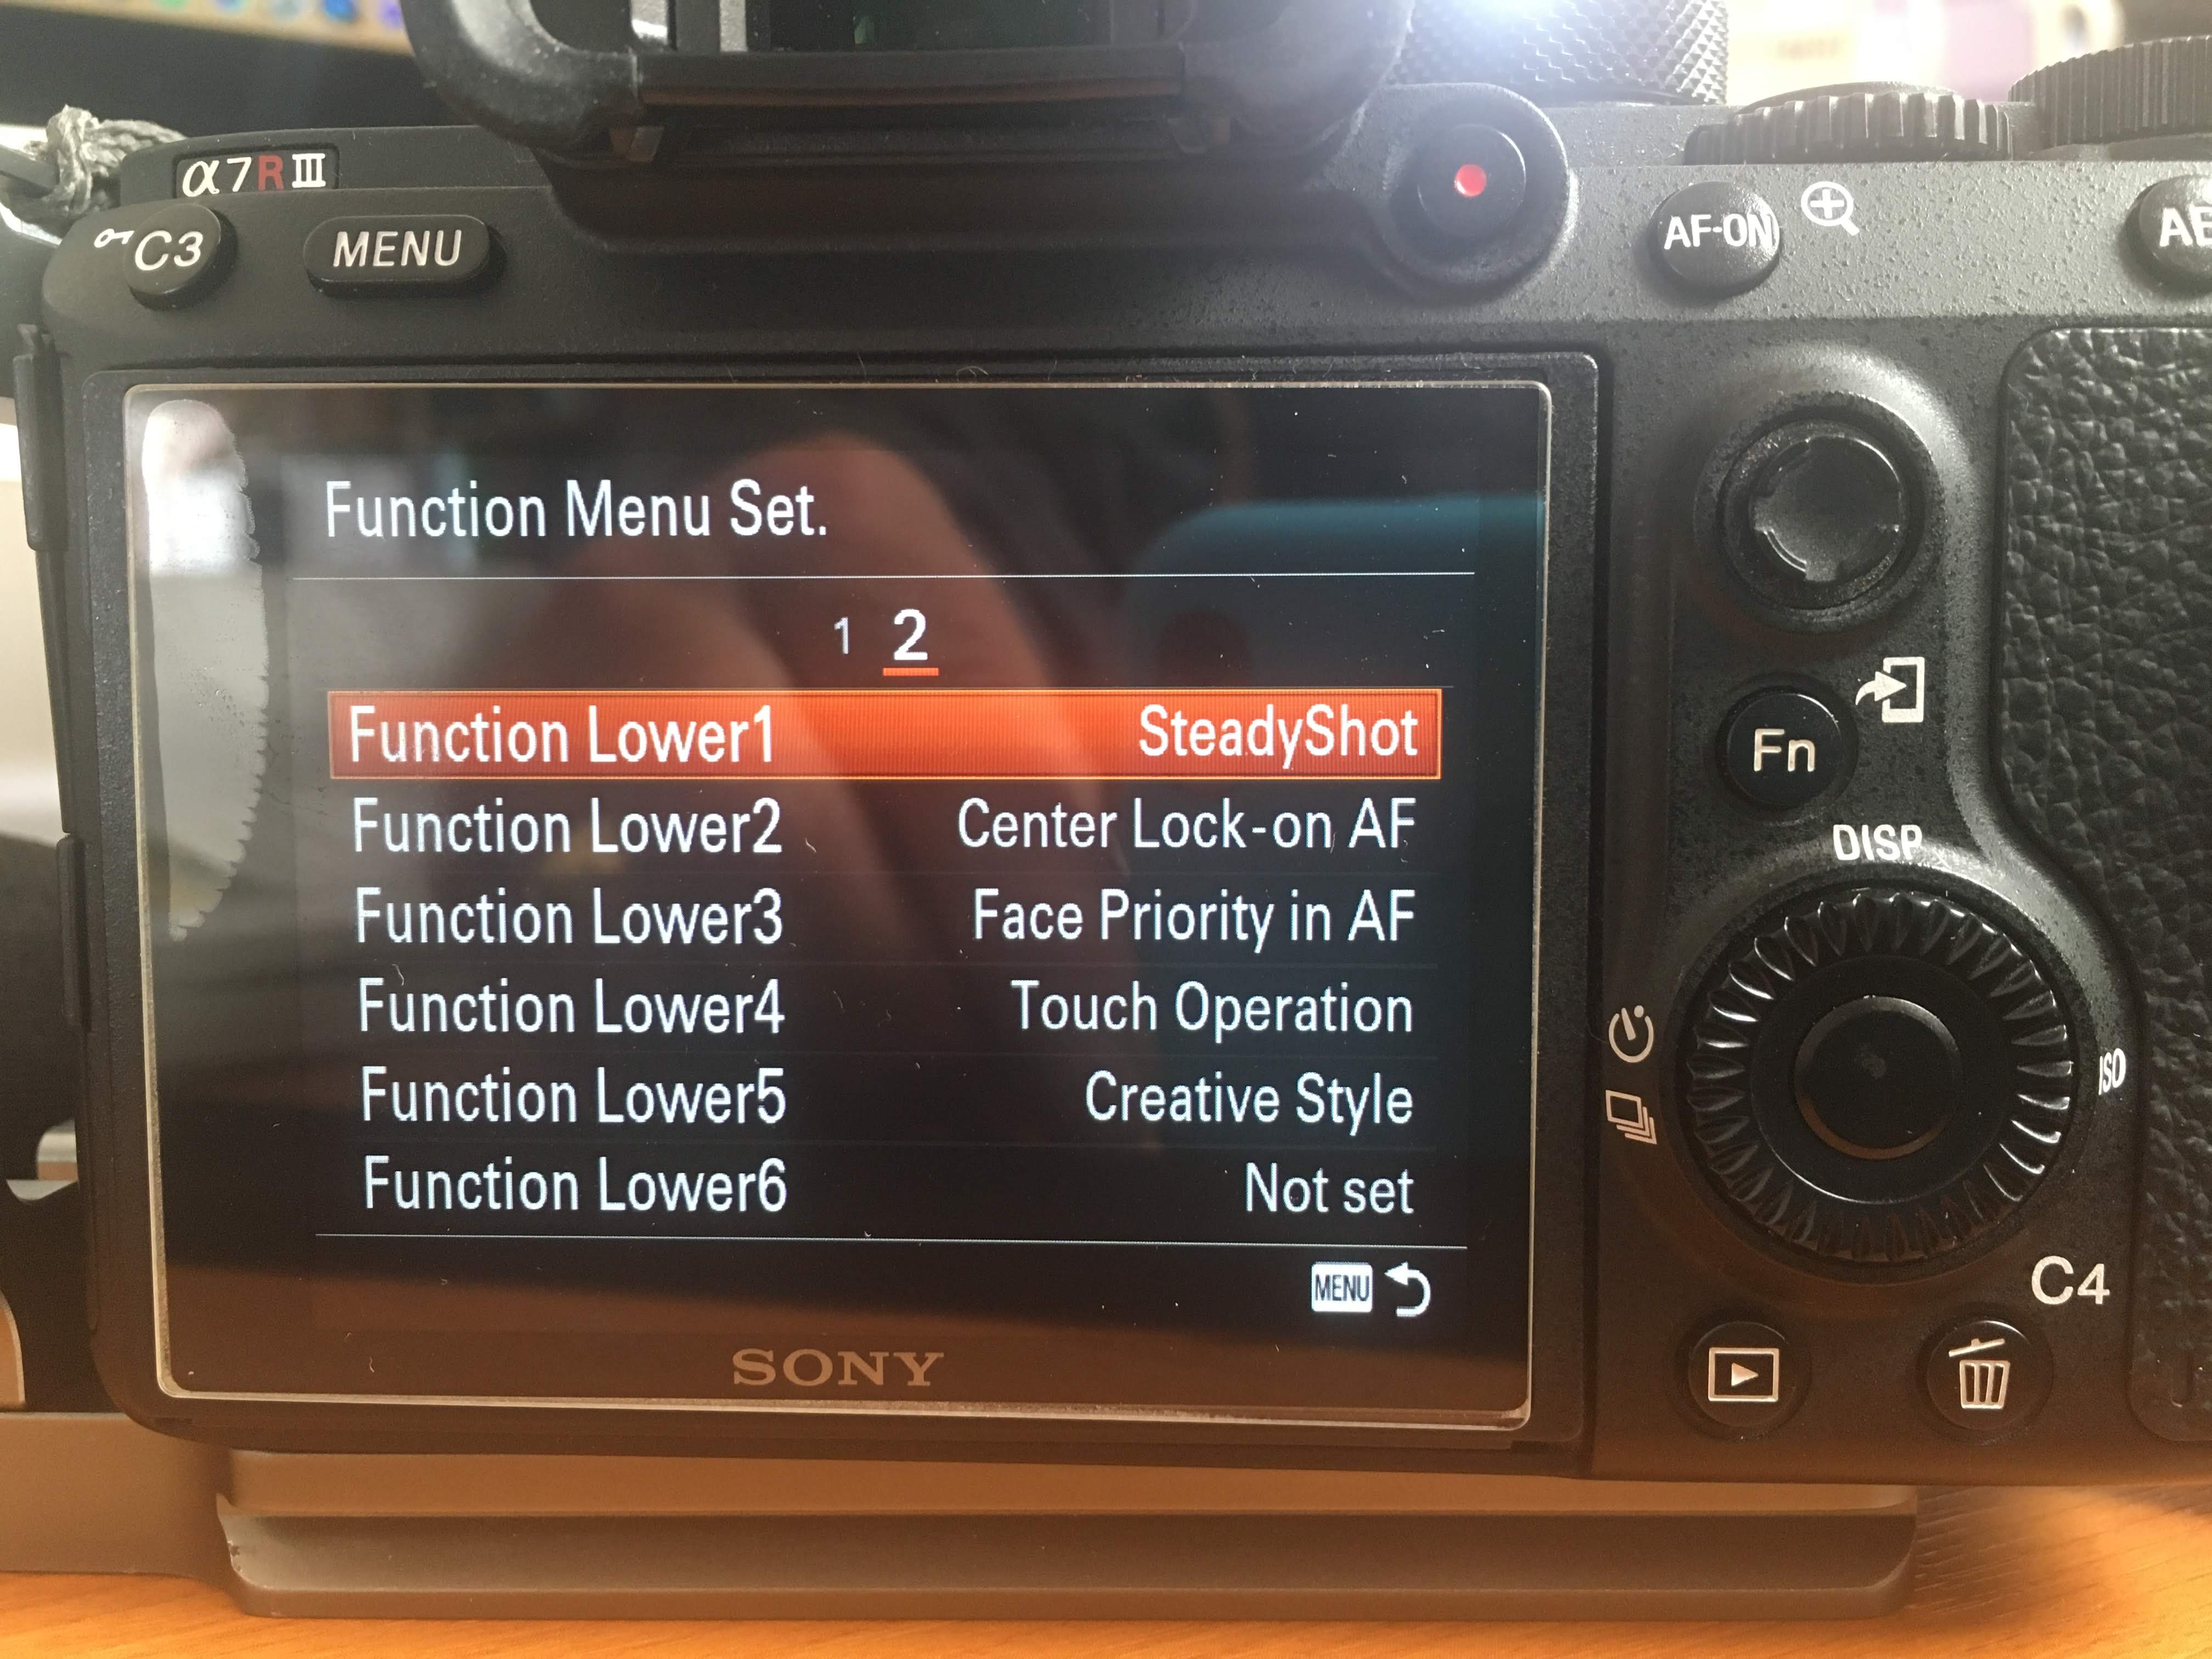
Steady Shot should be switched Off when the camera is mounted on a Tripod. My default value is On.
Centre Lock-on AF allows the camera to focus on a subject in the centre of the frame and then follow it as the camera tracks. My default value is Off, so that this tracking does not occur.
Face Priority in AF does exactly what it says, the camera looks for a face to provide the Auto Focus point. My defaul value is Off.
Touch Operation enable the Screen to be used in touch mode to determine focus point, for example. My default value is On.
Creative Style is a way of enabling Live View (the option above it) to represent the image better (rather than the default – which would be JPEG). I’ve dealt with this above.
Not set.
So this is what my Fn button screen looks like …
Finally, the options from the Menu system I’ve chosen to add to the My Menu screens – options that are often used and are somewhat difficult to get to in the normal way.
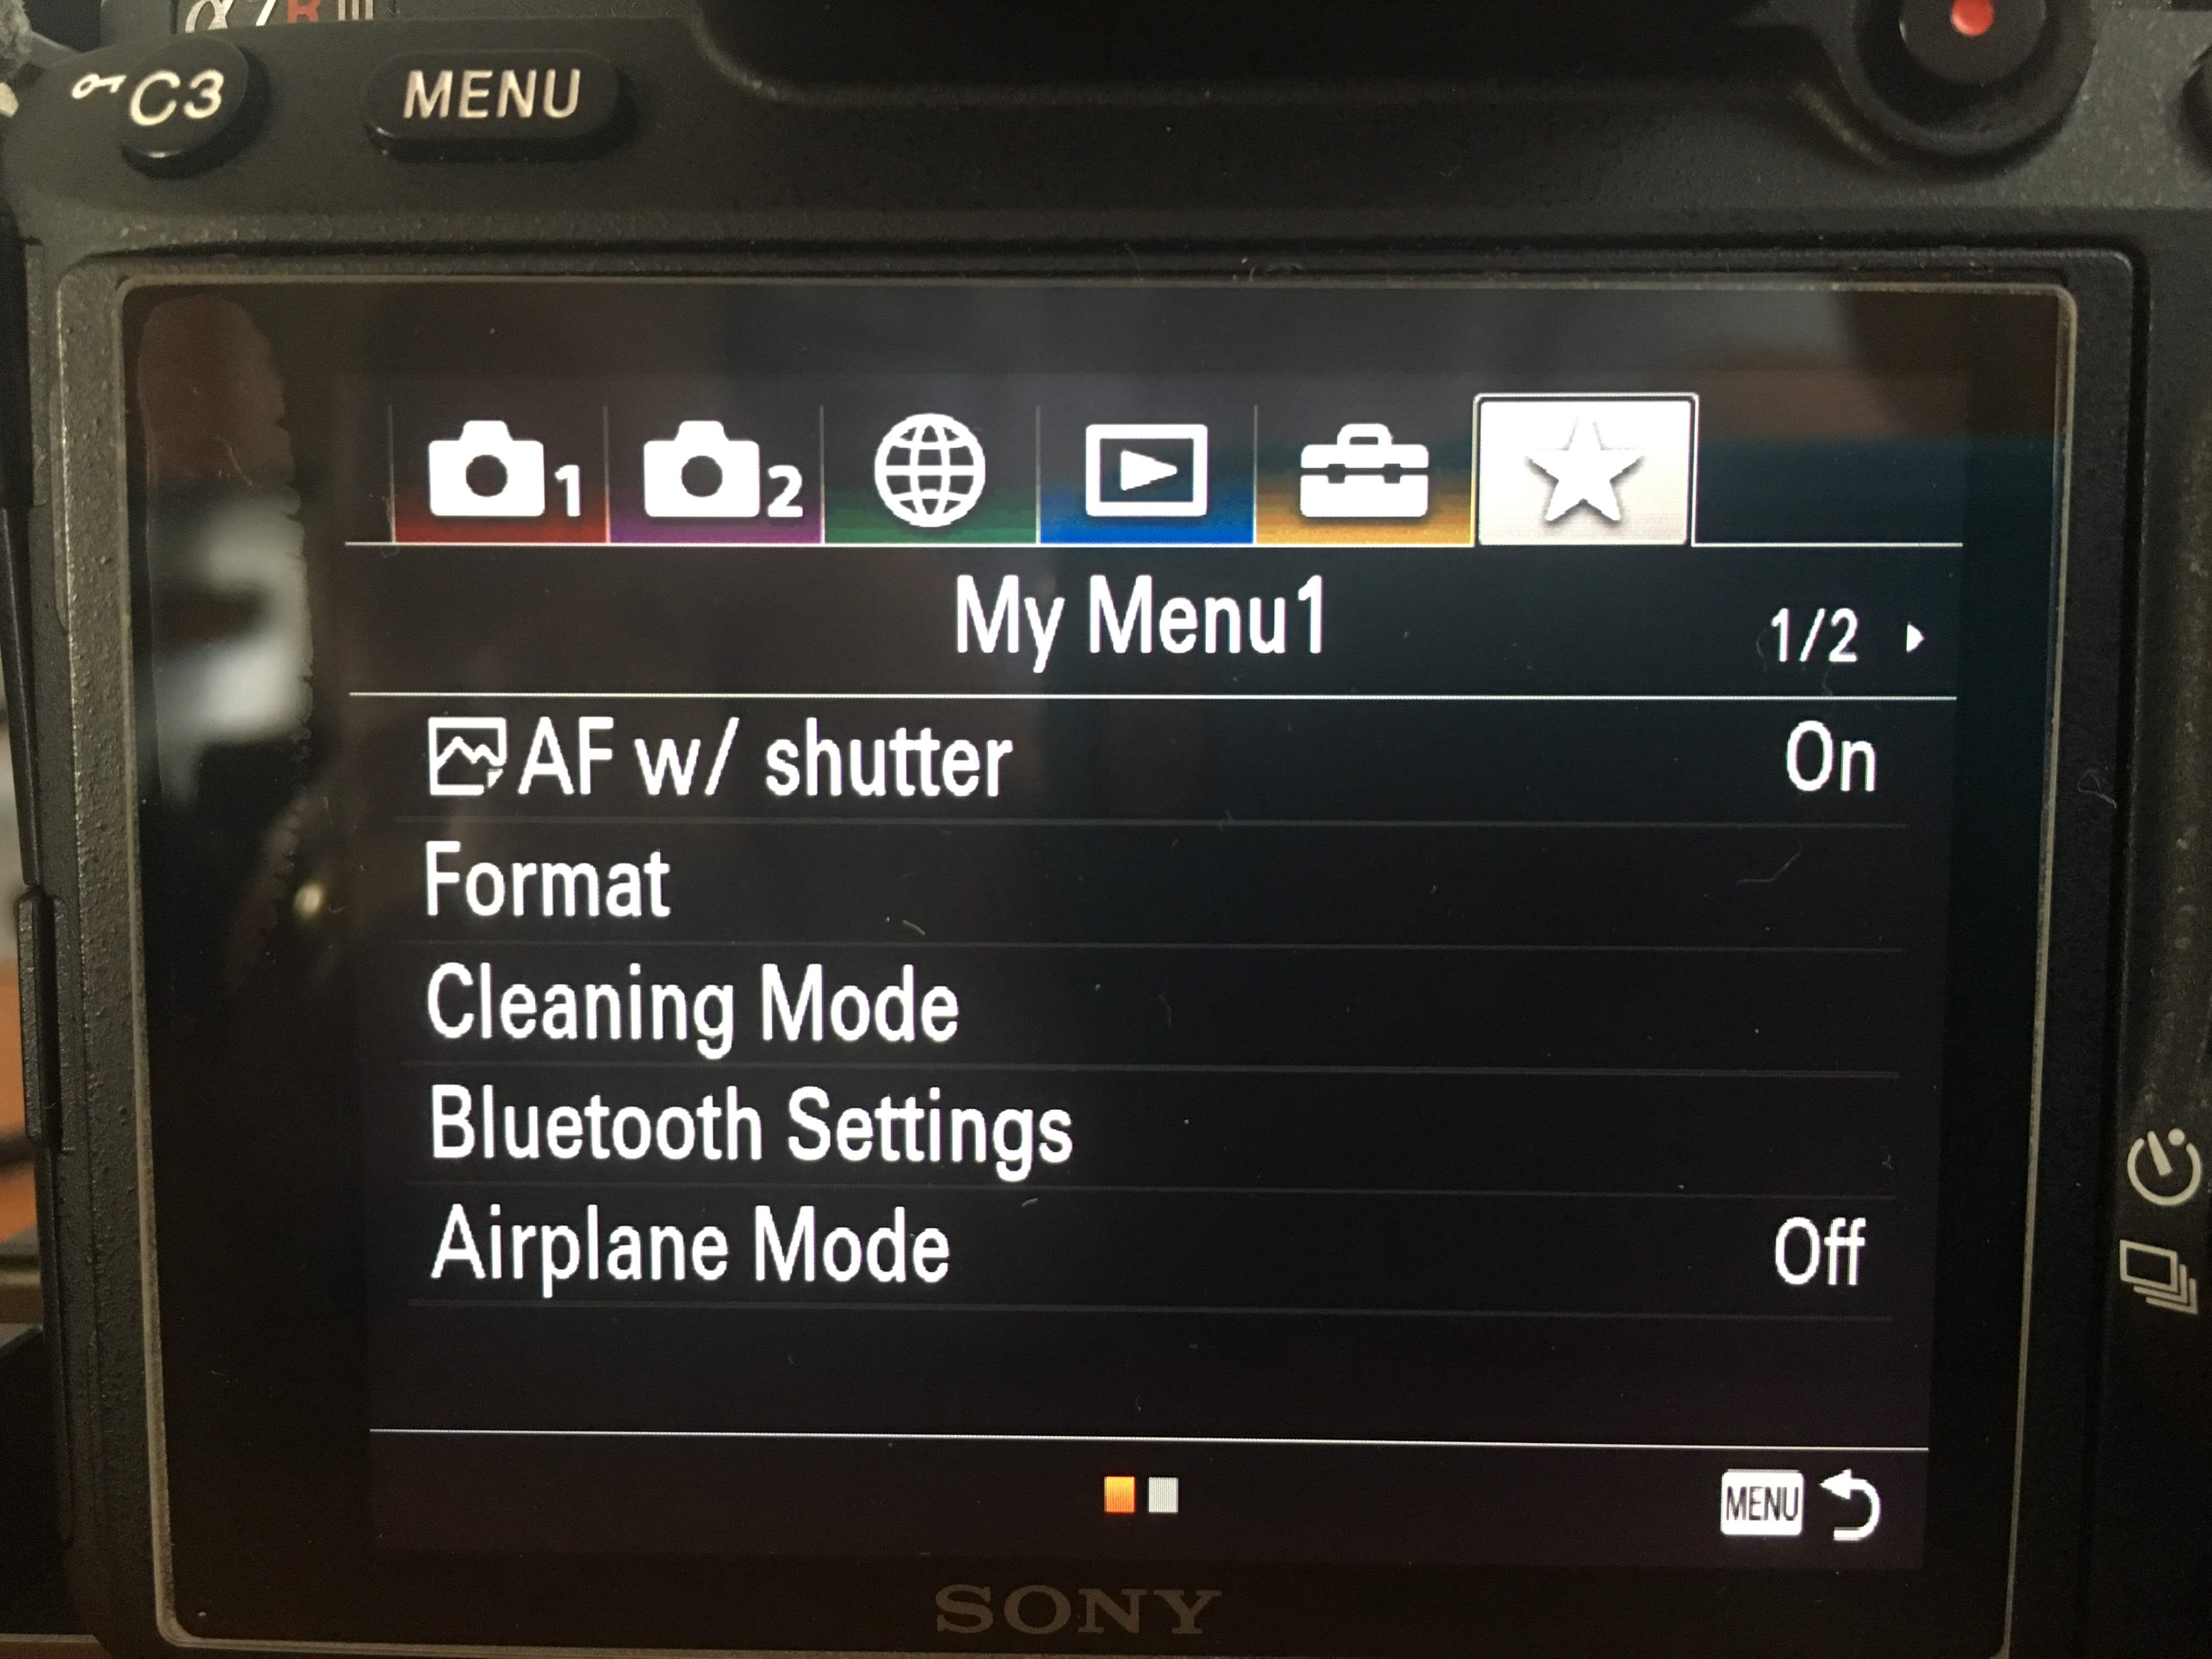
The first option is the way of selecting/deselecting Back Button Focus. When it’s set to On (my Default) auto-focus is engaged when the Shutter is depressed half-way. When it’s set to Off, then you can use the AF-ON button to focus independently from the Shutter.
The Format option is the way I clear the card after uploading the images to Lightroom. I prefer re-formatting a card, rather than deleting images.
Cleaning Mode is the way the sensor can be cleaned. After a few shudders and whirrs the sensor should have had the most obvious of particles dislodged.
Bluetooth Settings are here for when I might wish to connect the camera to another Bluetooth enable device.
Airplane Mode is just a quick way of switching off the wireless capabilities of the camera.
I’ve also added APSC/Super 35mm to Page 2 which enables me to change the options should I add a non-FE lens, or choose to crop the image in camera. I’ve set it to Manual so that I can choose whether to get the extra 1.5x reach in camera, so that it’s not selected on the basis of the lens that’s mounted (ie an E-mount lens, or an A-mount with a LA-4 adapter). I’ve set it to Off by default.
I’ll update this page later after I’ve decided how I’m going to set up my M1, M2 and M3 buttons. Initially I copied Mark Galer’s settings into the positions on the Mode dial but I want to examine how best I can use them myself, developing the settings from first principles. I’ll want to set one for preferred Tripod settings (Landscape), one for walking around hand-held (again Landscapes) and one possibly for portraits I should think, but that’s for another day.