

I watched this video recently about a subject that frequently crops up in Photography on the nature of JPEG compression, and just how much compression should be applied, and what resolution you should use (in camera) if you’re a JPEG-shooter.
Even though the video was a bit turgid in places, it got me to thinking about what a JPEG image looks like coming out of my camera against the RAW image I process. I watched it right to the end which showed some sticking power. I’ll give you what I interpreted as the main points of interest.
Pixels are more important than the Quality slider when saving a JPEG for the best image. So save with loads of Pixels – original number if possible, don’t drop the resolution therefore – and use a lower quality setting to reduce image size if that’s an issue for the card in your camera. Then in post-production, as suggested in what I consider (imho) to be the best written expose of JPEG and Lightroom by Friedl, when you drop below 72-80% quality (compression) there’s not much decrease in image size, and very little drop-off in visual presentation.
I’m fortunate to have two card slots in the Sony A7r MkIII and have set it up so that a JPEG image is sent to the second slot. This image is configurable by Quality (ie resolution – X-Fine, Fine, Standard) and Size (ie relating to the amount of compression applied – high 42m, medium 18m and small 11m). I thought it might be interesting to see what the images looked like when taken in a challenging lighting situation that required ISO 4000 to get a shot at 1/60@f4 on a 24mm lens. I thought I’d look at the RAW image as well to see how “superior” it was!!!
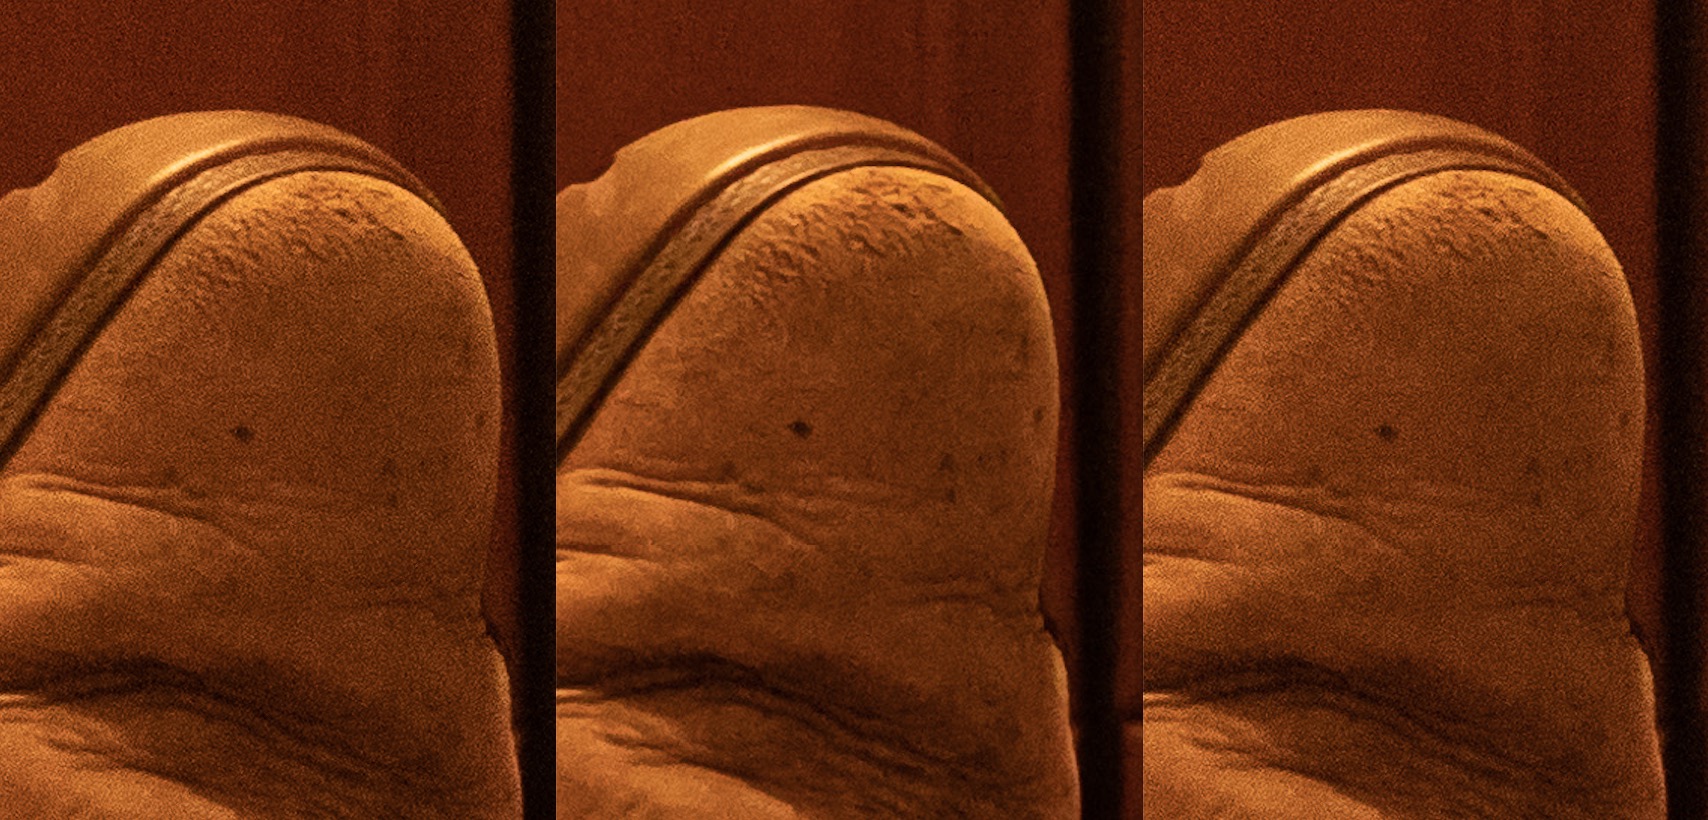
Well that was interesting. Out of the camera all the JPEG images were sharper and that really puzzled me. Why? It took me a short while to realise that I’d forgotten the reason why I shot in RAW in the first place. Duh! RAW just captures what the camera sees. It doesn’t apply any corrections. It just sees the image and records it. Phew! I realised I had to look at Noise Reduction and Sharpening to get the RAW image close to what the JPEG was giving me, but I have to admit the JPEG taken at Xtra-Fine and High gave a very good image straight out of the camera (that’s the one on the right above), and if I didn’t want to do any post-processing, I’d have been happy with it.
[Note the shot on the left is the unprocessed RAW image saved with no compression; the one in the centre is the processed RAW image at 80% quality (compression)]
Some statistics for the JPEG shots:
| Size of image from camera | Original Resolution | Cropped Resolution | Saved at 80% compression | Saved at 100% (no) compression | |
| XF-H | 23.4MB | 7952×5304 | 2137×2137 | 946KB | 2.8MB |
| XF-S | 7.3MB | 3984×2656 | 1070×1070 | 365KB | 886KB |
| Std-H | 7.6MB | 7952×7952 | 2102×2102 | 901KB | 2.4MB |
| Std-S | 2.7MB | 3984×2656 | 1088×1088 | 384KB | 824KB |
Key:
XF = Xtra-Fine (high resolution)
Std = “standard” resolution
H = High File Size (ie little compression to reduce file size)
S = Small (ie considerable compression to reduce file size)
I cropped all the images including the RAW image (originally 85.8Mb in size) to a square to get a comparable image at each resolution. For the RAW image this was 2126×2126 – comparable with the XF-L and Std-L JPEG images. I then saved the images at 80% Quality and 100% Quality (ie no compression) in Lightroom. For the RAW file this gave figures of 4.9Mb for the 100% Quality, and 1.5Mb for the 80% Quality. So you end up getting a JPEG from a RAW file (at this resolution) that is not greatly different from the JPEG taken from the camera.
How did I get the RAW to outperform the JPEG? I had to look at a number of sliders in Lightroom. Starting with Noise Reduction and then moving on to using Texture to arrive at an image that I liked. So the question is … is it worth using JPEG to just capture the moment. The answer is most definitely YES. I’ve always said that, and this piece of empirical research suggests that JPEG in the Sony camera is very good at noise reduction and sharpening. You may lose the colour information and the tones are not represented quite as well; but in this poor lighting situation where the ISO is very high (ISO 4000) the quality of the JPEG image is very good. So, armed with this information I just need to make a decision on how I set the camera up. Do I want to save a JPEG image as a backup to the RAW, in which case I need to set it to XF-H (in my notation), or for taking the card out of the camera to share on social media, in which case I would probably set the camera to record the JPEG shot as a Std-S image.
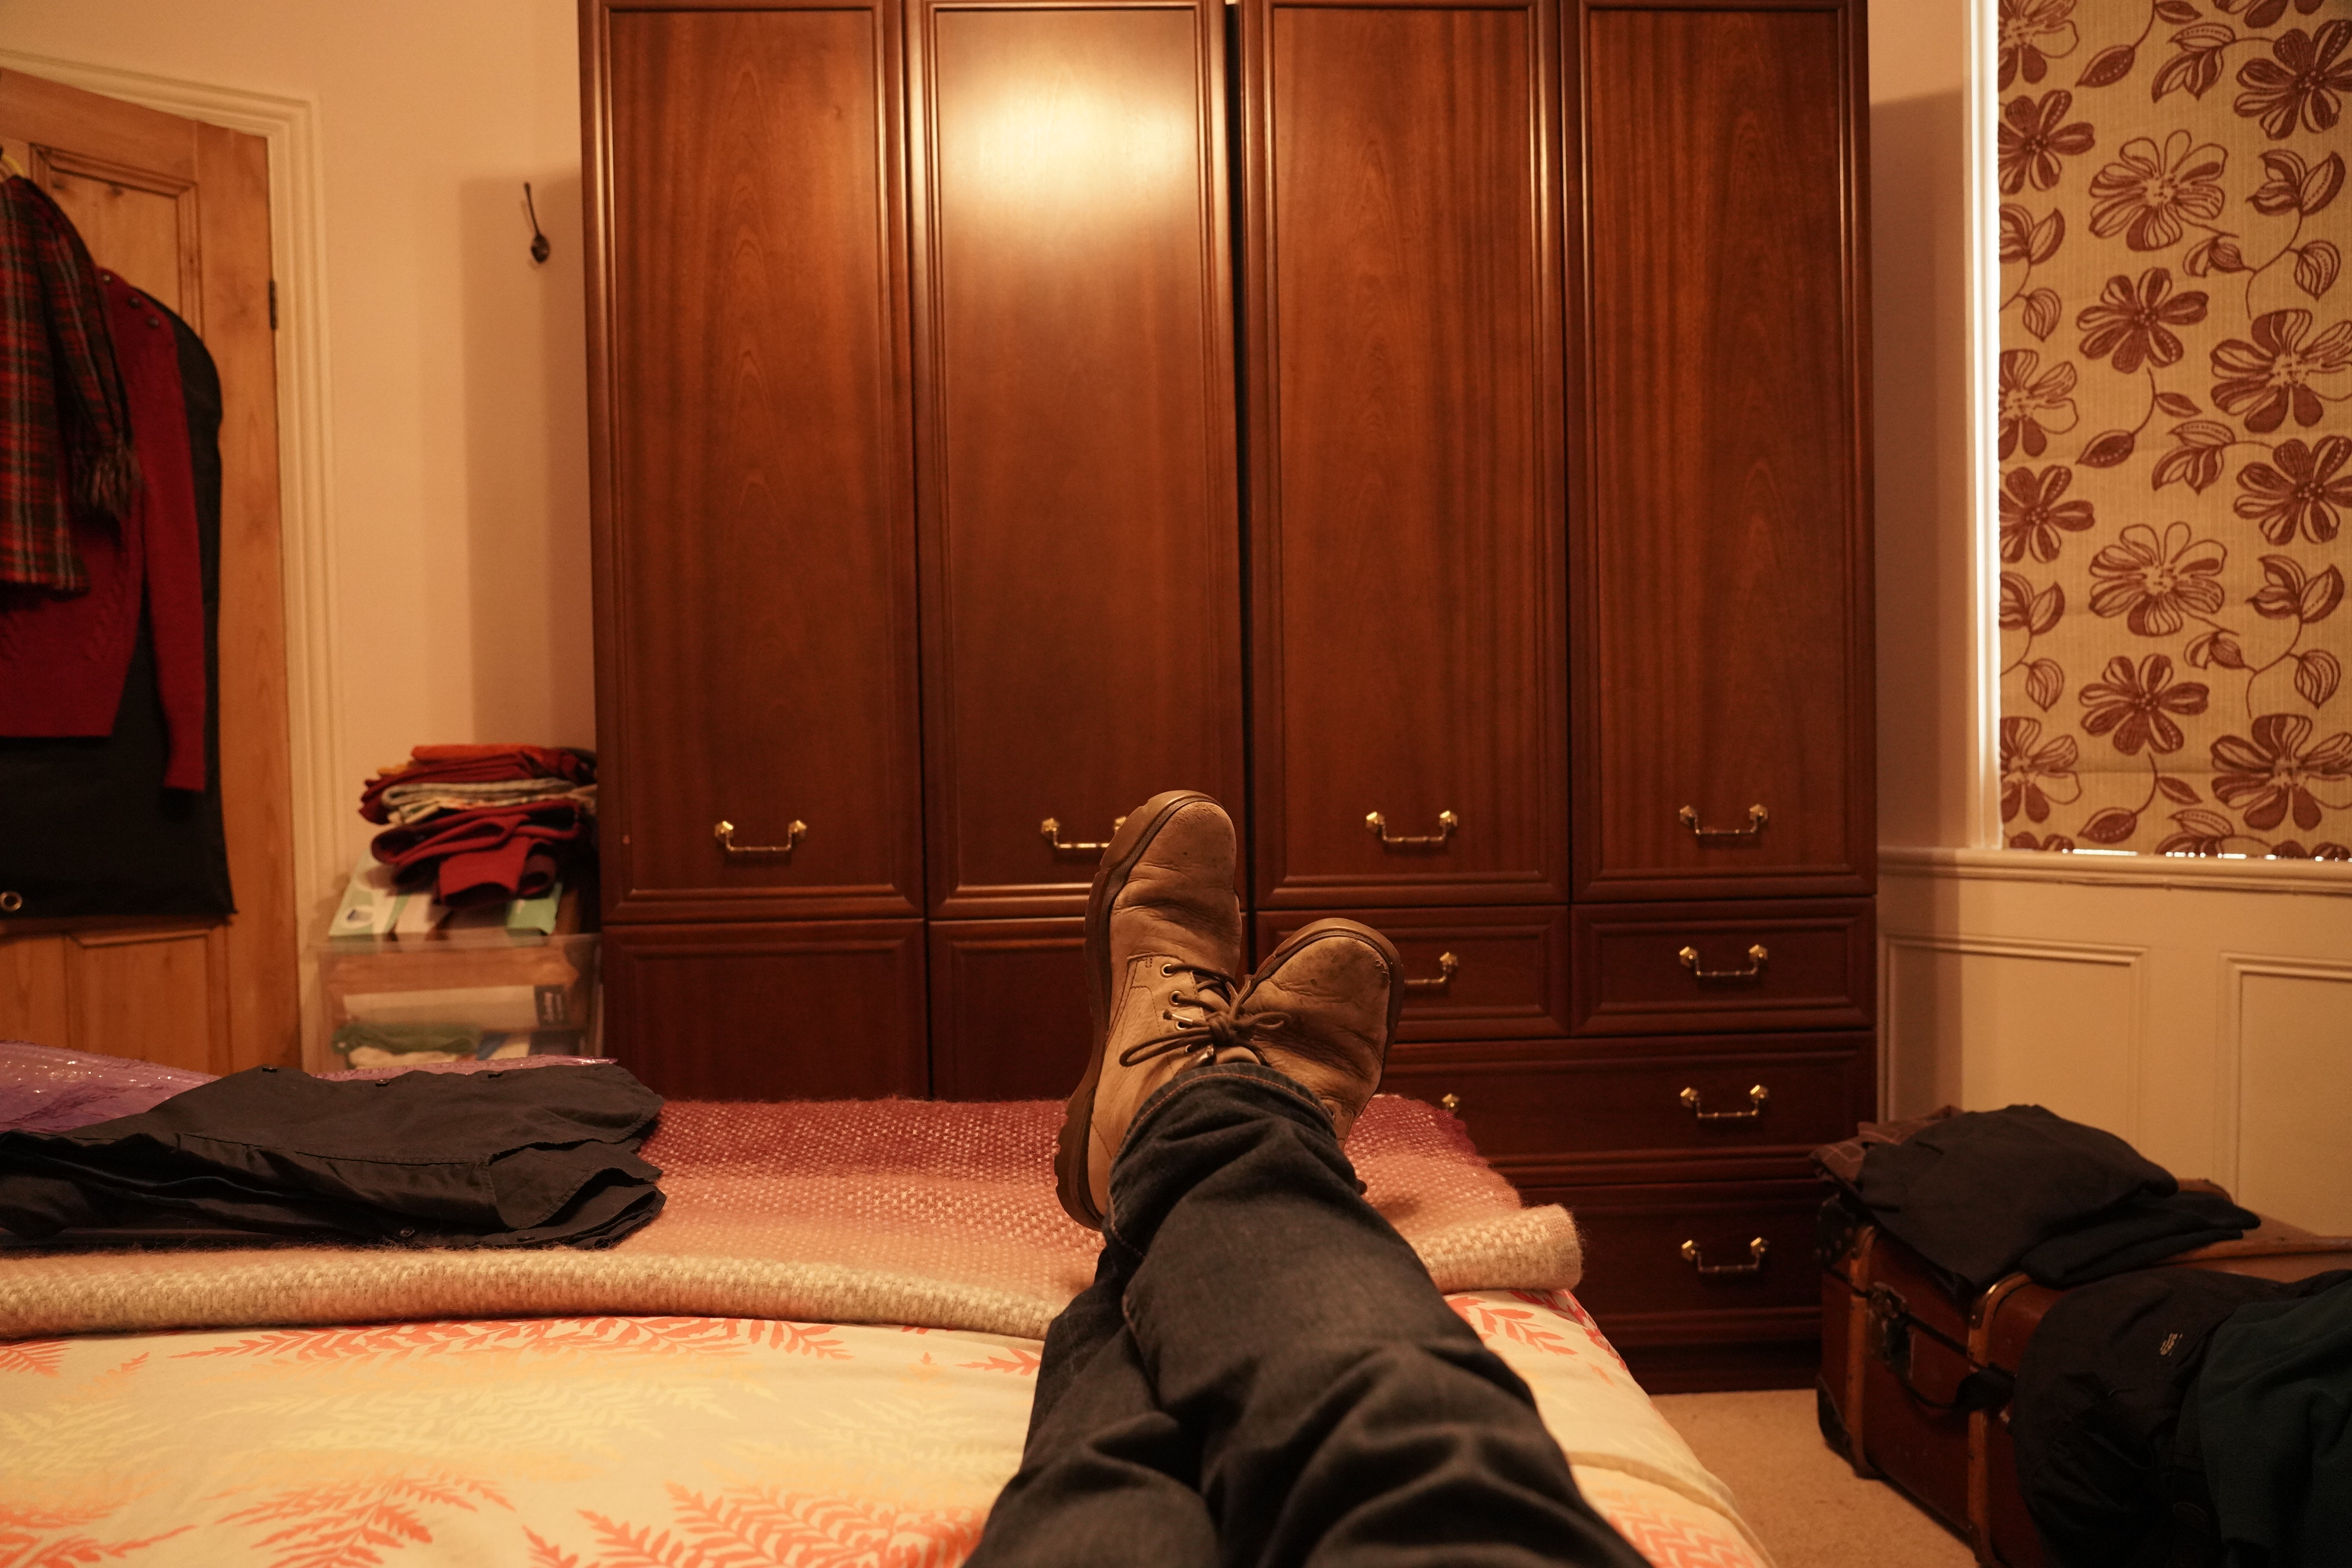
These are some of the test shots taken whilst I had my feet up! You can download the originals from the [Download] link under the photo if you want to more closely examine them.

The uncropped Std-S JPEG image saved at 100% [Download]
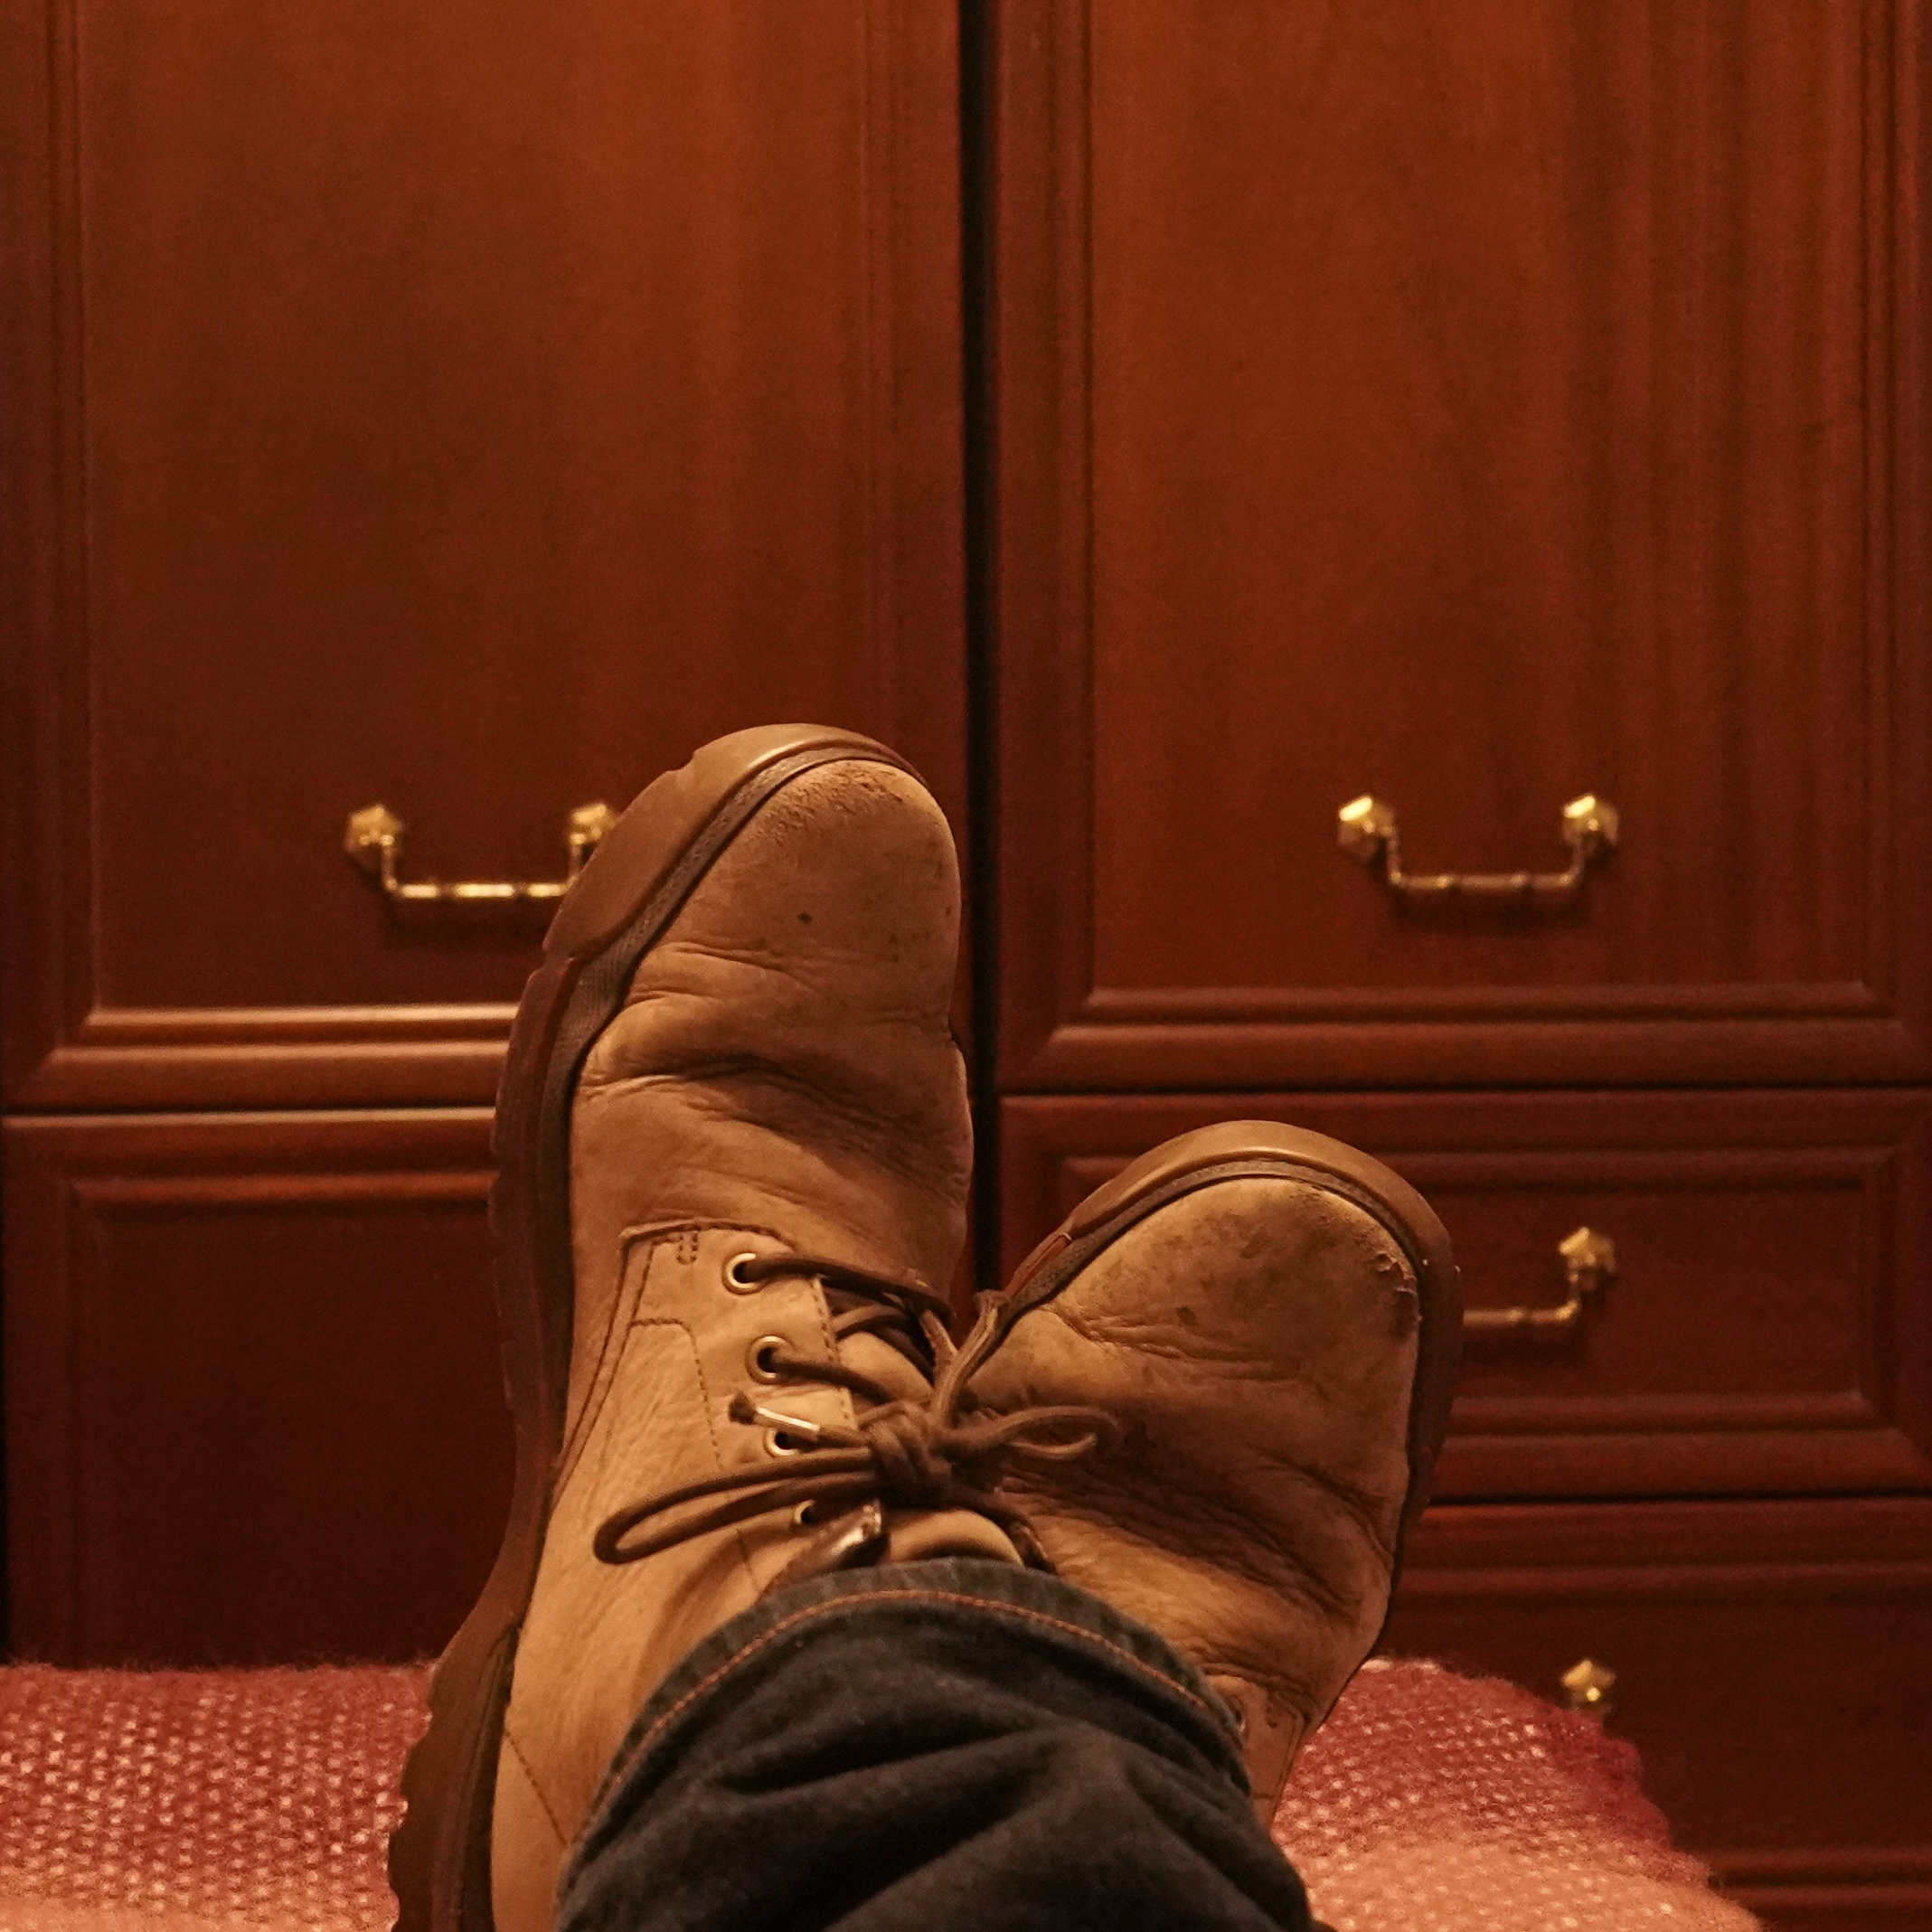
The cropped JPEG image saved from Lr at 100% reducing the file size to 2.8Mb; a loss of detail, but generally excellent noise reduction. [Download]

The cropped RAW image, grain and noise present because of high ISO [Download]

The finished RAW image at 80% Quality, after Noise Reduction – luminance and sharpening applied, as well as a bit of Texture added. Image size now 1.7Mb reduced from 6.4Mb cropped image. [Download]
So a final conclusion … if you’re a JPEG-man, I guess you should do the minimum amount of compression in camera, and you should shoot at the highest possible resolution. Then in post-processing you can safely save your JPEG at a reasonably high-rate of compression (lower quality setting) whilst keeping the resolution as high as you can. Does that rather obvious statement make sense?