These notes were prepared as part of a Lightroom Training Course for Cardiff U3A. There are many better references to how Photoshop and Lightroom work together, not least of which is Scott Kelby’s book. There are references to other articles and videos at the end of this post.
First a little house-keeping of your software and hardware.
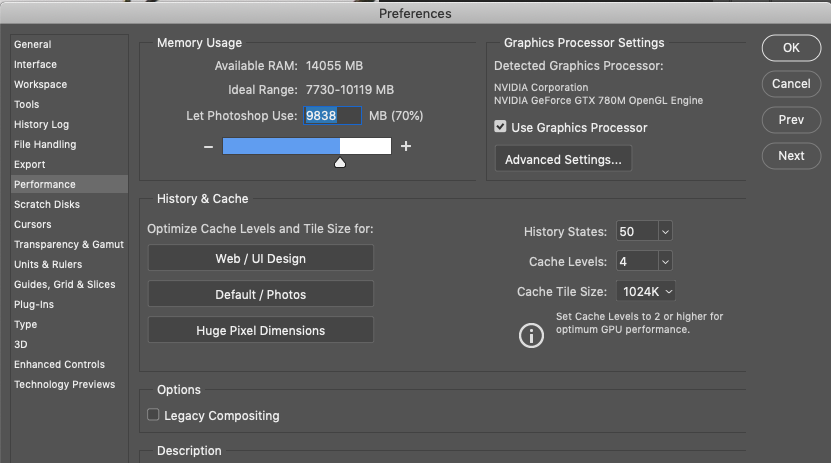
Maximising performance – Graphic accelerator
If your system has a Graphics Accelerator, make sure it’s switched on for both Lightroom and Photoshop (otherwise you may get a warning message when Photoshop starts).
In Lightroom>Preferences>Performance

In Photoshop>Preferences>Performance
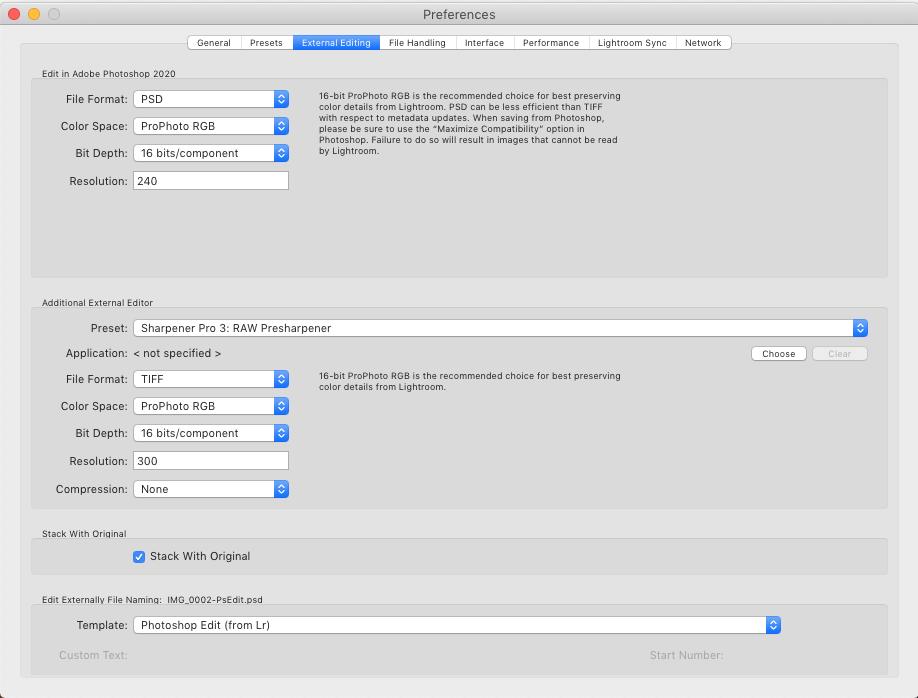
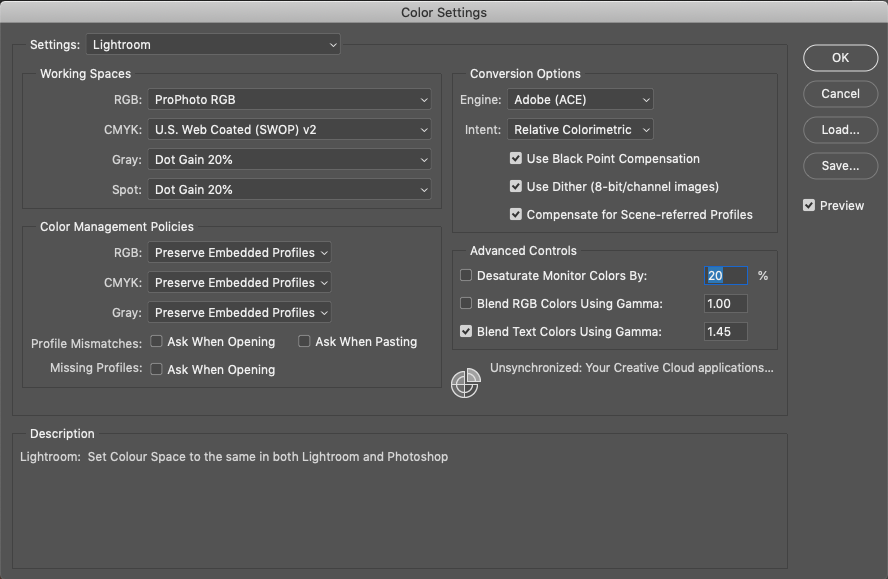
Setting up Lightroom and Photoshop for same Colour Space
In Lightroom>Preferences>External Editing – choose ProPhoto RGB, and if your intention is to save the image back to Lightroom – potentially for further editing – choose PSD as your file format. Also I suggest giving the external file a slightly different name eg add -PsEdit to the filename because although it will be returned as a Photoshop .psd file, it’s sometimes just worthwhile to make sure you know the image you’re looking at HAS been edited in Photoshop.
In Photoshop>Edit>Colour Settings – choose ProPhoto RGB
Having done these, or perhaps even before doing these, why not check your camera, printer and monitor are all working in the same colour space – I’d suggest using sRGB (not Adobe sRG). If you want the complete low-down on all matters to do with colour space and profiles look at this article, or this one, however a much less technical article that informed my thinking is this one.
In any case it might be worth making sure your monitor is calibrated to show the best representation of what your camera captures, and also to make sure that you set your print options to let your Printer Manage the colour. Hopefully, this guide from Adobe might help!
Getting an image into Photoshop
In Lightroom, select and image and press … cmd-E (Mac) or ctrl-E (PC) – if Photoshop is not already open, it will open automatically.
Returning an image to Lightroom
If you’ve setup the Filename as I have suggested (in Lightroom – see above), just press … cmd-S (Mac) or ctrl-S (PC) and the .psd file will be saved back to Lightroom to sit alongside the original file which will not have been changed!
So, what might you want to use Photoshop for …
-
Changing the canvas size of an image and cloning in a background to fill the new extended canvas
-
Content aware fill of background space after transformation (eg rotation)of an image
-
Focus stacking in macro and landscape photography to give front to back depth of field
-
Removing a background altogether to get the subject out of an image to be able to put it somewhere else
-
Removing anything from an image , eg an unwanted person
-
Removing something that detracts from an image (eg a fence, or a post)
-
Replacing a boring sky
-
Changing the colour of anything
I will look at just a couple of these …
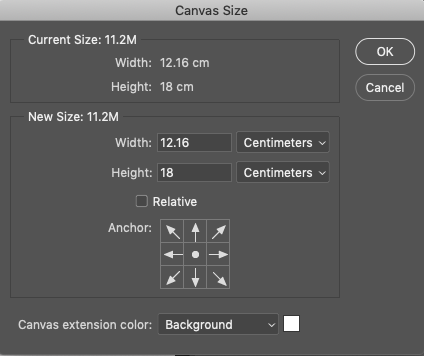
Changing the Canvas Size and Cloning a background
Photoshop>Image>Canvas Size – change size of canvas space using the arrow keys to indicate where the anchor point of where the changes are to take place.
Then, select the Clone Tool and a Brush Setting …

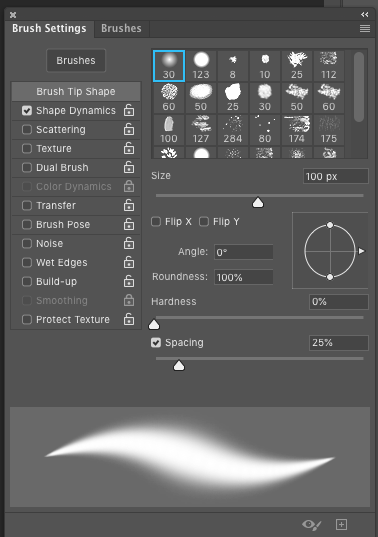
Next, click on the source area for the cloned background choice (it will be tied to the brush as you move it) by pressing opt/alt-click (Mac), or alt-click (PC).
Paint away and then Photoshop>File>Save (or cmd-S/ctrl-S) and the image will be saved back to Lightroom and stored alongside the original image.
A couple of trivial images show this with a mainly white background. In Lightroom after editing and cropping I get a square image …
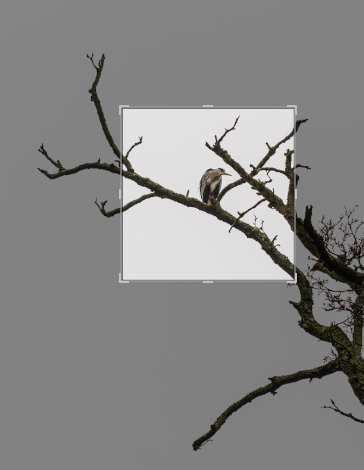
… but perhaps a postcard shape would be better …
Content aware fill after transformation
I first used this technique to present a panel on the church in Llantrisant by making it appear that I’d shot the panel from directly in front of it, whereas I’d taken the shot from below and to the left of the panel.
The original shot …

… after transformations in Lightroom to try and get the perspective right …

… after cloning and content aware fill in Photoshop …

I’ll now try to re-create the fill part of this process with this photo …

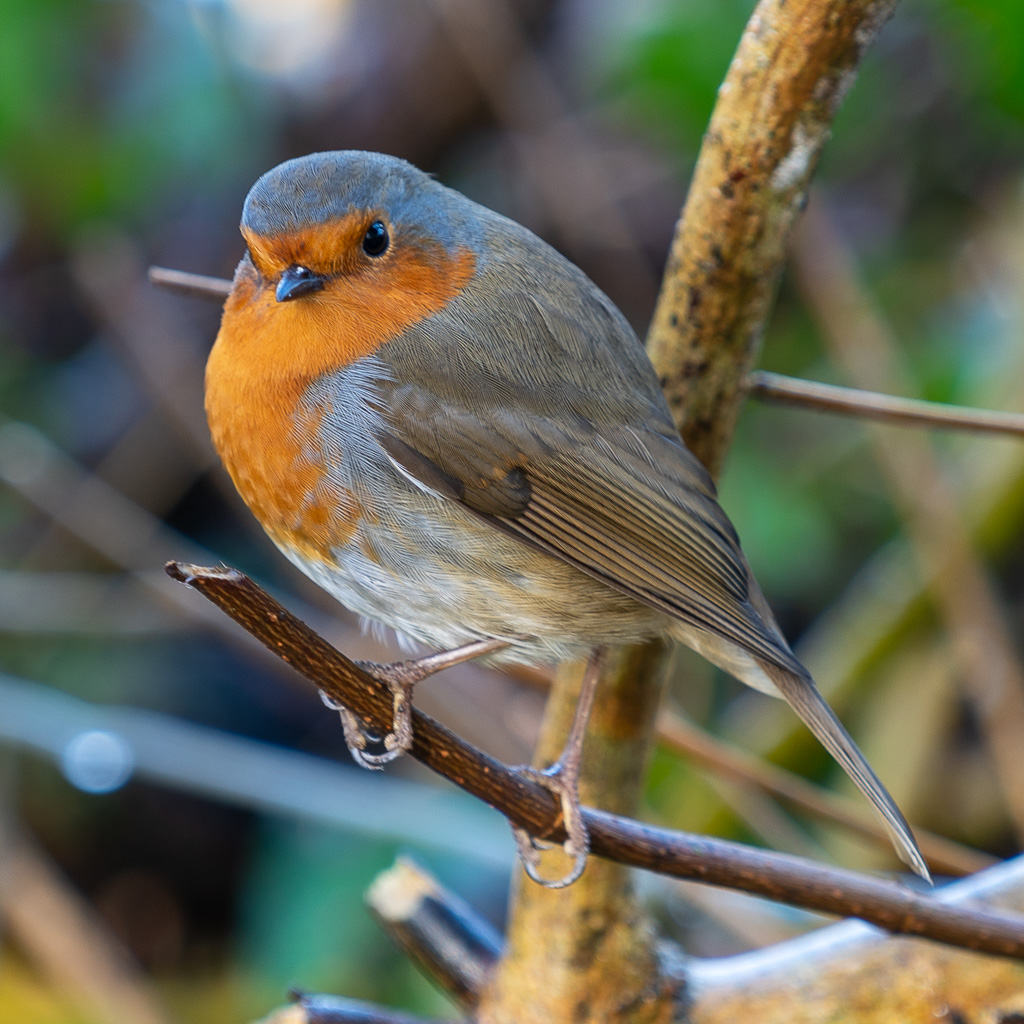
Straightened in Lightroom – note no Constrained Crop applied (which would have greatly reduced the image space – losing quite a bit of the branch) …
… then after Content Aware Fill applied in Photoshop …

What are the steps …
-
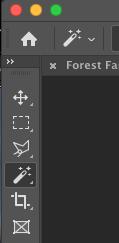
Select the Magic Wand Tool in Photoshop – you do this from the Action Tools icon (see below) …
- Click on one of the Gap areas
- Continue with Shift-click to extend the areas you want to apply Content Aware Fill
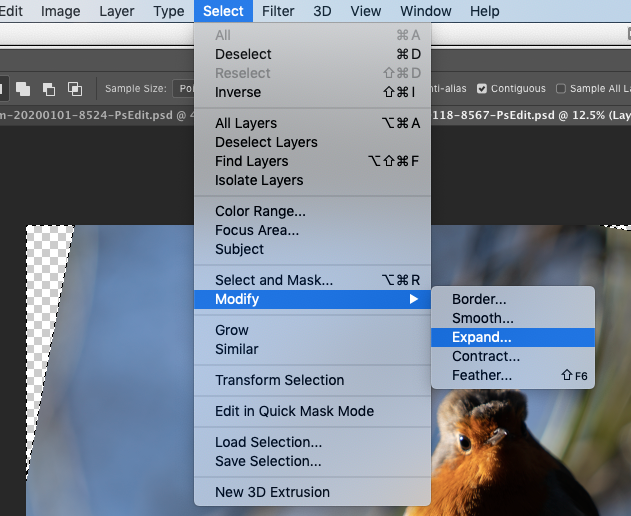
- Expand the area that the fill will be applied to … Photoshop>Select>Modify>Expand – suggested that 4 pixels is chosen
- Then Photoshop>Edit>Content Aware Fill …
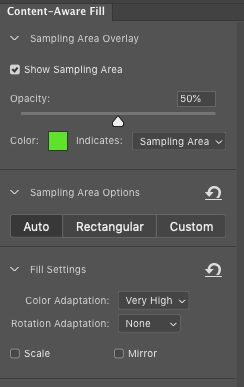
- Try changing the Fill settings>Colour adaptation (see Magic Minutes video in References)
- Finally, save back to Lightroom when it looks the way you want it to.
Focus Stacking
Take a look at this video which shows how you can get an infinite depth of field – focus is perfect therefore from front-to-back.
Removing a background
Sometimes you might want to remove the background of an image, this video shows you how you can achieve this.
Removing anything from an image
Lots of ways of doing this ranging from the easy and straightforward way to a more comprehensive treatment of the subject using layers.
Here’s how you might remove something that detracts from an image (eg a fence)
Painting out the fence on a layer mask
-
Open your image and make a new layer. Rename it “fence mask.”
-
Zoom in close to your fence, then choose a hard-edged brush that is just slightly larger than the edge of your fence (be sure your paintbrush color is black).
-
To paint the fence, simply click at the beginning of the fence, then hold the shift key, move the brush to the next section of fence and click. This will create a straight line.
-
Continue this process over every section of the fence. While this can take some time, duplicating the pattern generally won’t work as no two sections will be the same).
-
While zoomed in, to move around the image, press the space bar to bring up the Hand and then move the image to where you need it. Then continue painting in the fence lines.
-
Be sure to paint over all the discrepancies in the fence. If some sections of the fence aren’t straight, simply paint in two or three points.
-
Once you have painted in all the fence lines, you can move onto the next step.
-
Select the background layer and turn off the fence mask layer using the eye icon next to the layer.
-
Now hold Ctrl (PC) or Cmd (Mac) and click on the thumbnail of the fence mask layer. This will select the fence layer.
-
Go to Edit->Content-Aware Fill (If you are using an older version of Photoshop, for to Edit->Fill and then choose Content-Aware from the dropdown section).
-
This will open up the Content-Aware Fill settings. Leave them at the default settings. Just change the Output To: setting to New Layer. Click OK.
-
Press Ctrl+D (PC) or Cmd+D (Mac) to deselect the fence.
-
To see how the Content-Aware Fill tool has worked, turn off your background layer momentarily. Then turn it back on.
The original after editing in Lightroom …
… the wire removedin Photoshop, but an artefact left behind …

… which I did a quick attempt to edit back in Lightroom – and I do mean quick – to show that you can continue editing an image in Lightroom after its been to Photoshop (and back) …

For more information on how to do more edits using this technique as a starter, look at this article (from which the notes above were taken) …
Replacing a boring sky
This technique relies on you having a library of “interesting skies” which match the colour tone of the image that you’re working on!
Changing the colour of anything
Say the colour of a dress, this article shows how it can be done.
Some further reading or watching
A video series – Getting started with Photoshop – for Photoshop beginners (like me)
Setting-up Lightroom and Photoshop to work together – a comprehensive guide to the Preferences boxes, from which I just selected the important ones.
Sending a RAW file from Lightroom to Photoshop, and some basic editing – besides describing how you send a RAW file to and from Photoshop, this article describes how the two might work together after a Transform in Lightroom might require a subsequent Content Aware Fill in Photoshop.
A beginner’s Guide to Adobe Photoshop – focuses on editing in Photoshop, not in Lightroom, so perhaps not so easy to follow, but does explain the basic features of Photoshop reasonably well.
Understanding Layers in Photoshop – an introduction to Layers, why and how they can be used, as well as describing Adjustment Layers and Masks. Reasonably easy to read and understand; the penny dropped for me after reading this!
Photoshop Adjustment Layers, Part 1 and Part 2 – beyond the description of what they do, these articles describe how you might use them and what the various settings you can employ mean, and do.
A comprehensive treatment of Content Aware Fill – not for the faint hearted, but it does show how a perfect result can be achieved!
Photoshop Magic Minutes (from Adobe) – many videos in this series. They are all just one minute long! This one shows Colour adaptation setting in Content aware fill – how one setting in Photoshop’s Content Aware Fill workspace can greatly enhance the way that the image edit turns out.