External Hard Disks for Photographers

I described my Workflow at the first session of a Lightroom course I led yesterday. An instrumental and very important part of that workflow is holding my Images and Catalog(s) on an external hard disk. In the long term (after and hopefully Adobe implements it in Lightroom) it might enable photographers with a tablet (which has a USB-C port that supports a sufficient USB file transfer speed) to use an external hard disk whilst travelling with a tablet, to enable later editing on the desktop or laptop when back at home. A use-case I’ve tested, but found to have flaws currently. A few provisos there then, but let’s just keep our fingers crossed and hope for the best – then I might just be tempted to buy an iPad Pro.

For starters, here’s an article you might wish to look at to get you “in the mood” when considering external hard drives for your computer.

It’s important to know the ports you have on the machine(s) you might want to connect the disk to; it could be that Thunderbolt is not of interest to you but USB-C might well be. [Note: Currently Thunderbolt 3 delivered over USB-C will be the gold standard for Mac users.] Otherwise there are cheaper alternatives to the Lacie I’m using if the ports are just “standard USB-A” – the usual older ports which support USB 2 and USB 3 file transfer speeds.

This is a confusing subject, which I find it hard to get my head around anyway, so I’m attaching a link to an article that should help you identify what ports you have but be aware that the gold standard will one day be USB 4 which will replace the current leading standard USB 3.2, so looking at this article might help you clear the fog.

From this you’ll gather it’s important to know not just the physical port type – USB-A or USB-C, but also the speed of the connection (and cable) it supports – this could at best be USB 3.2 today, but most probably will be USB 3, or 3.1.

So you need to check the specification of your USB Port and the transfer speed it will support. A minefield I know, but it’s an important subject to try and understand to make sure you don’t get stuck with old technology which is being flogged on the cheap because the suppliers know it’s going to be superseded.

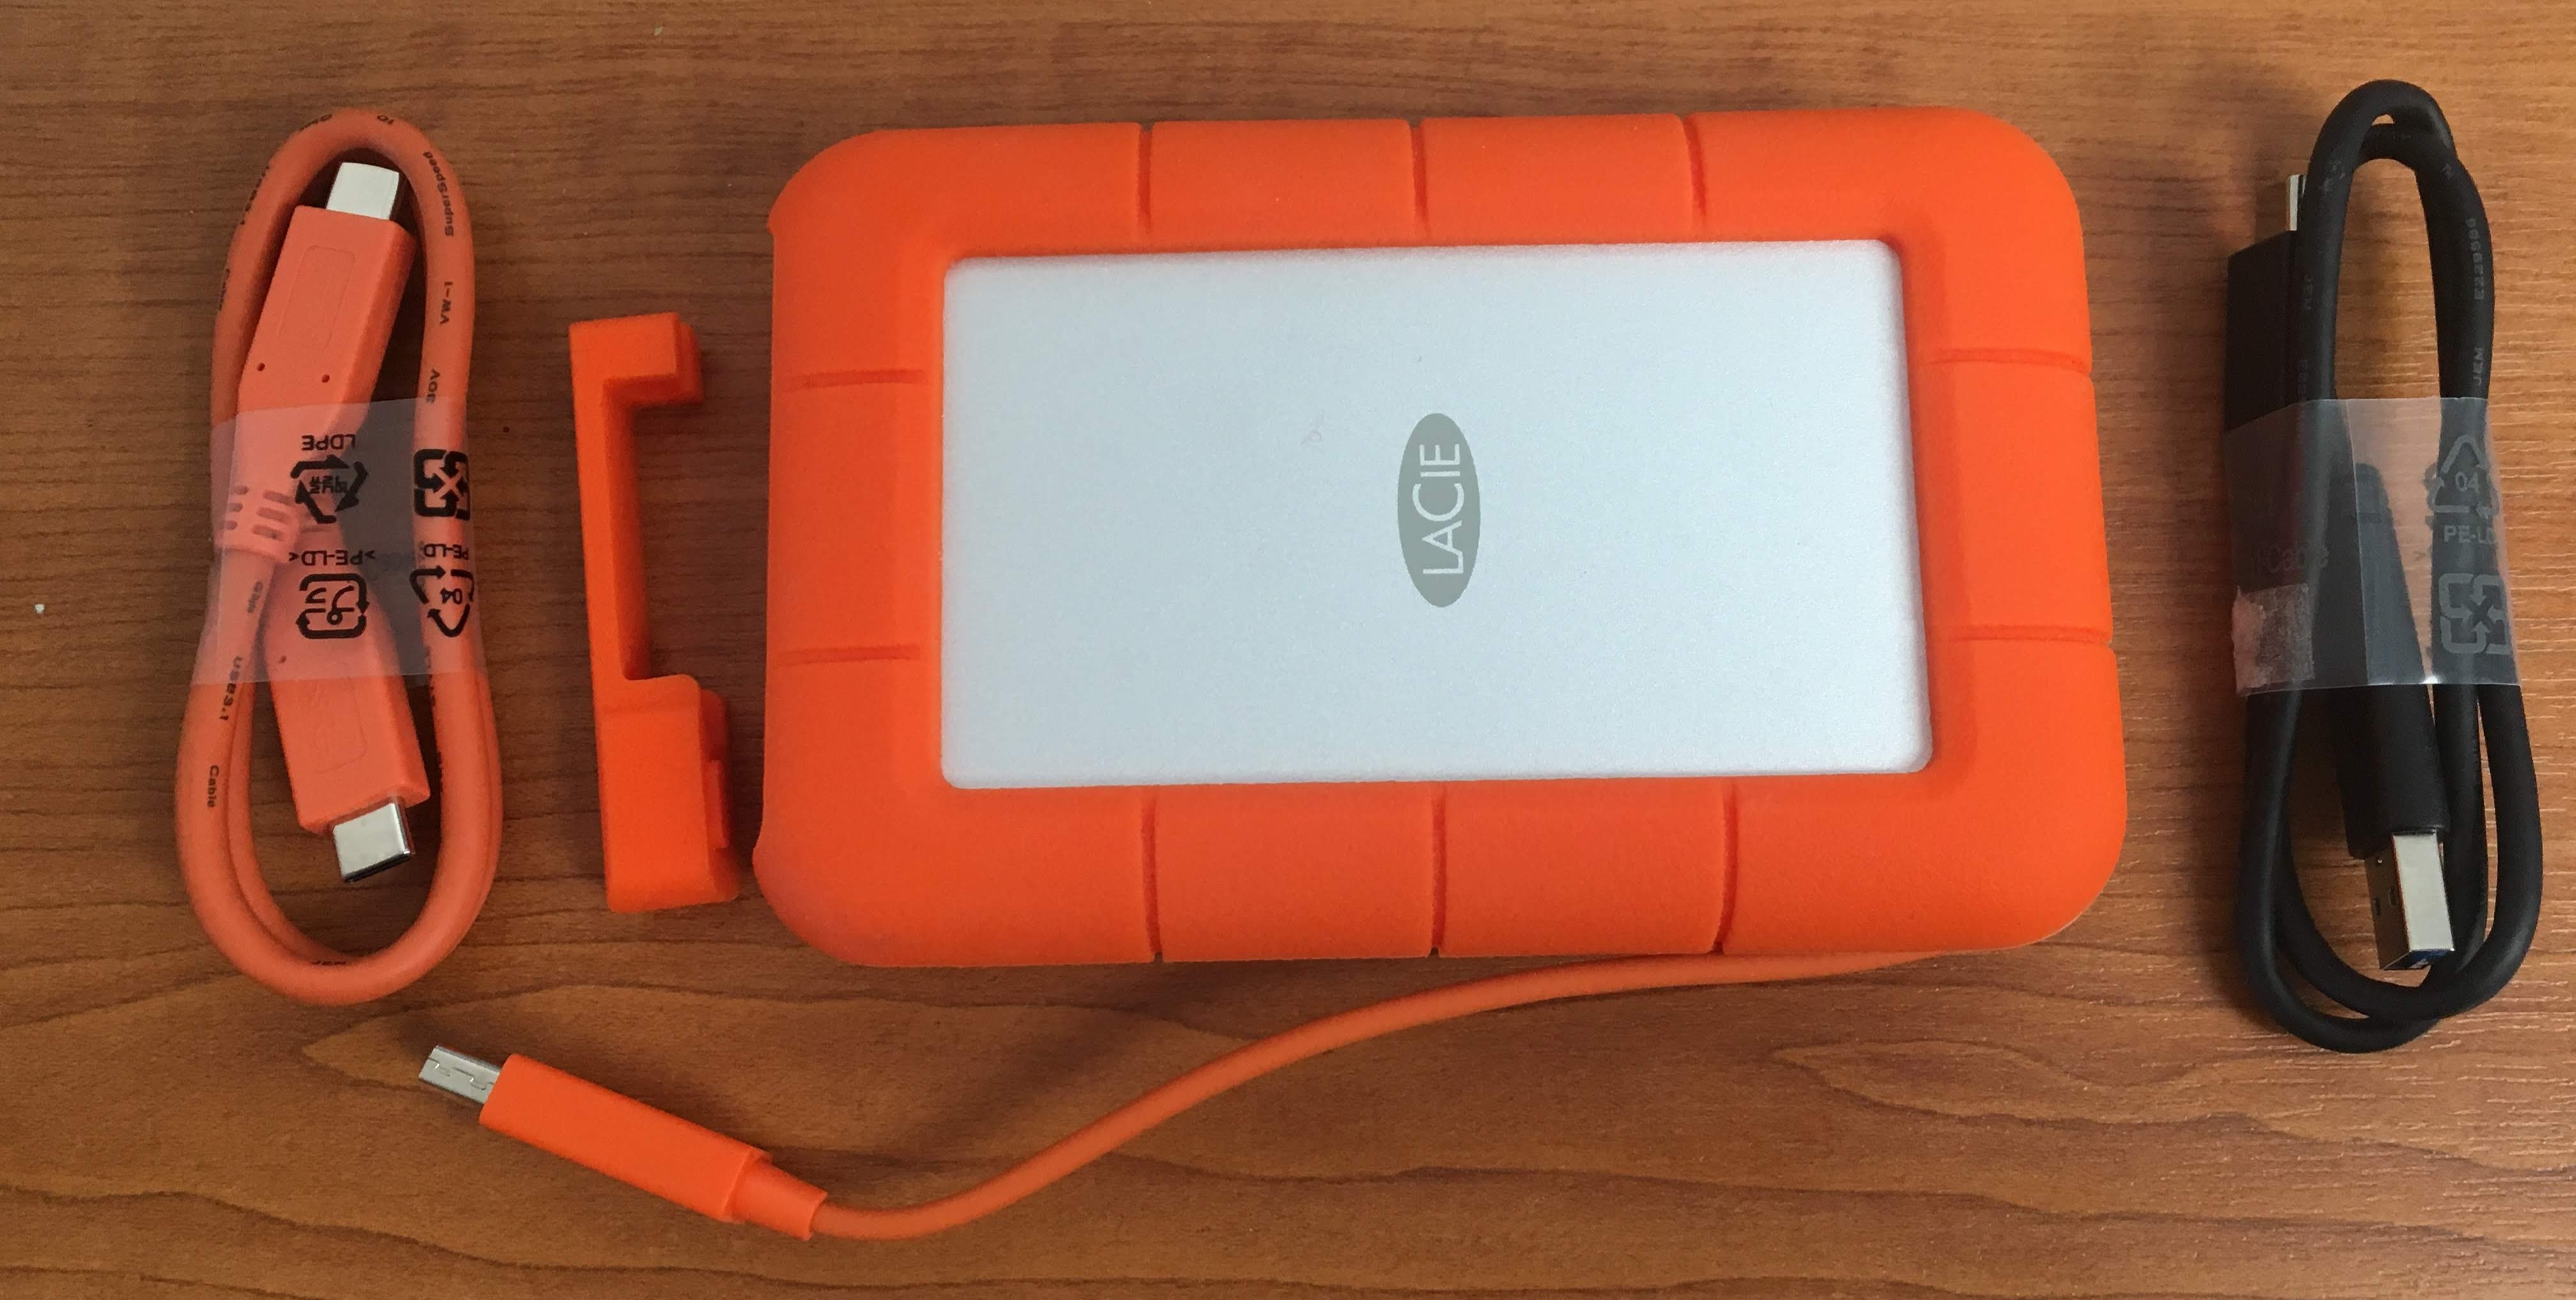
Here’s a review of the sort of external hard disks photographers should be looking at. Here’s a review of the disk I’m currently using  and which is pictured above. It’s a a Rugged 500Mb Thunderbolt Drive from Lacie (a Seagate company) which I got from Amazon. For the Mac user it has the advantage of using a fixed old-style Thunderbolt cable connection – which for my purposes was it’s USP until yesterday when I realised I was using the Thunderbolt port on the Mac for the video output; however the disk is also supplied with USB-C -> USB-C, and USB-C -> USB-A cables so you have future-proofing provided out-of-the-box.

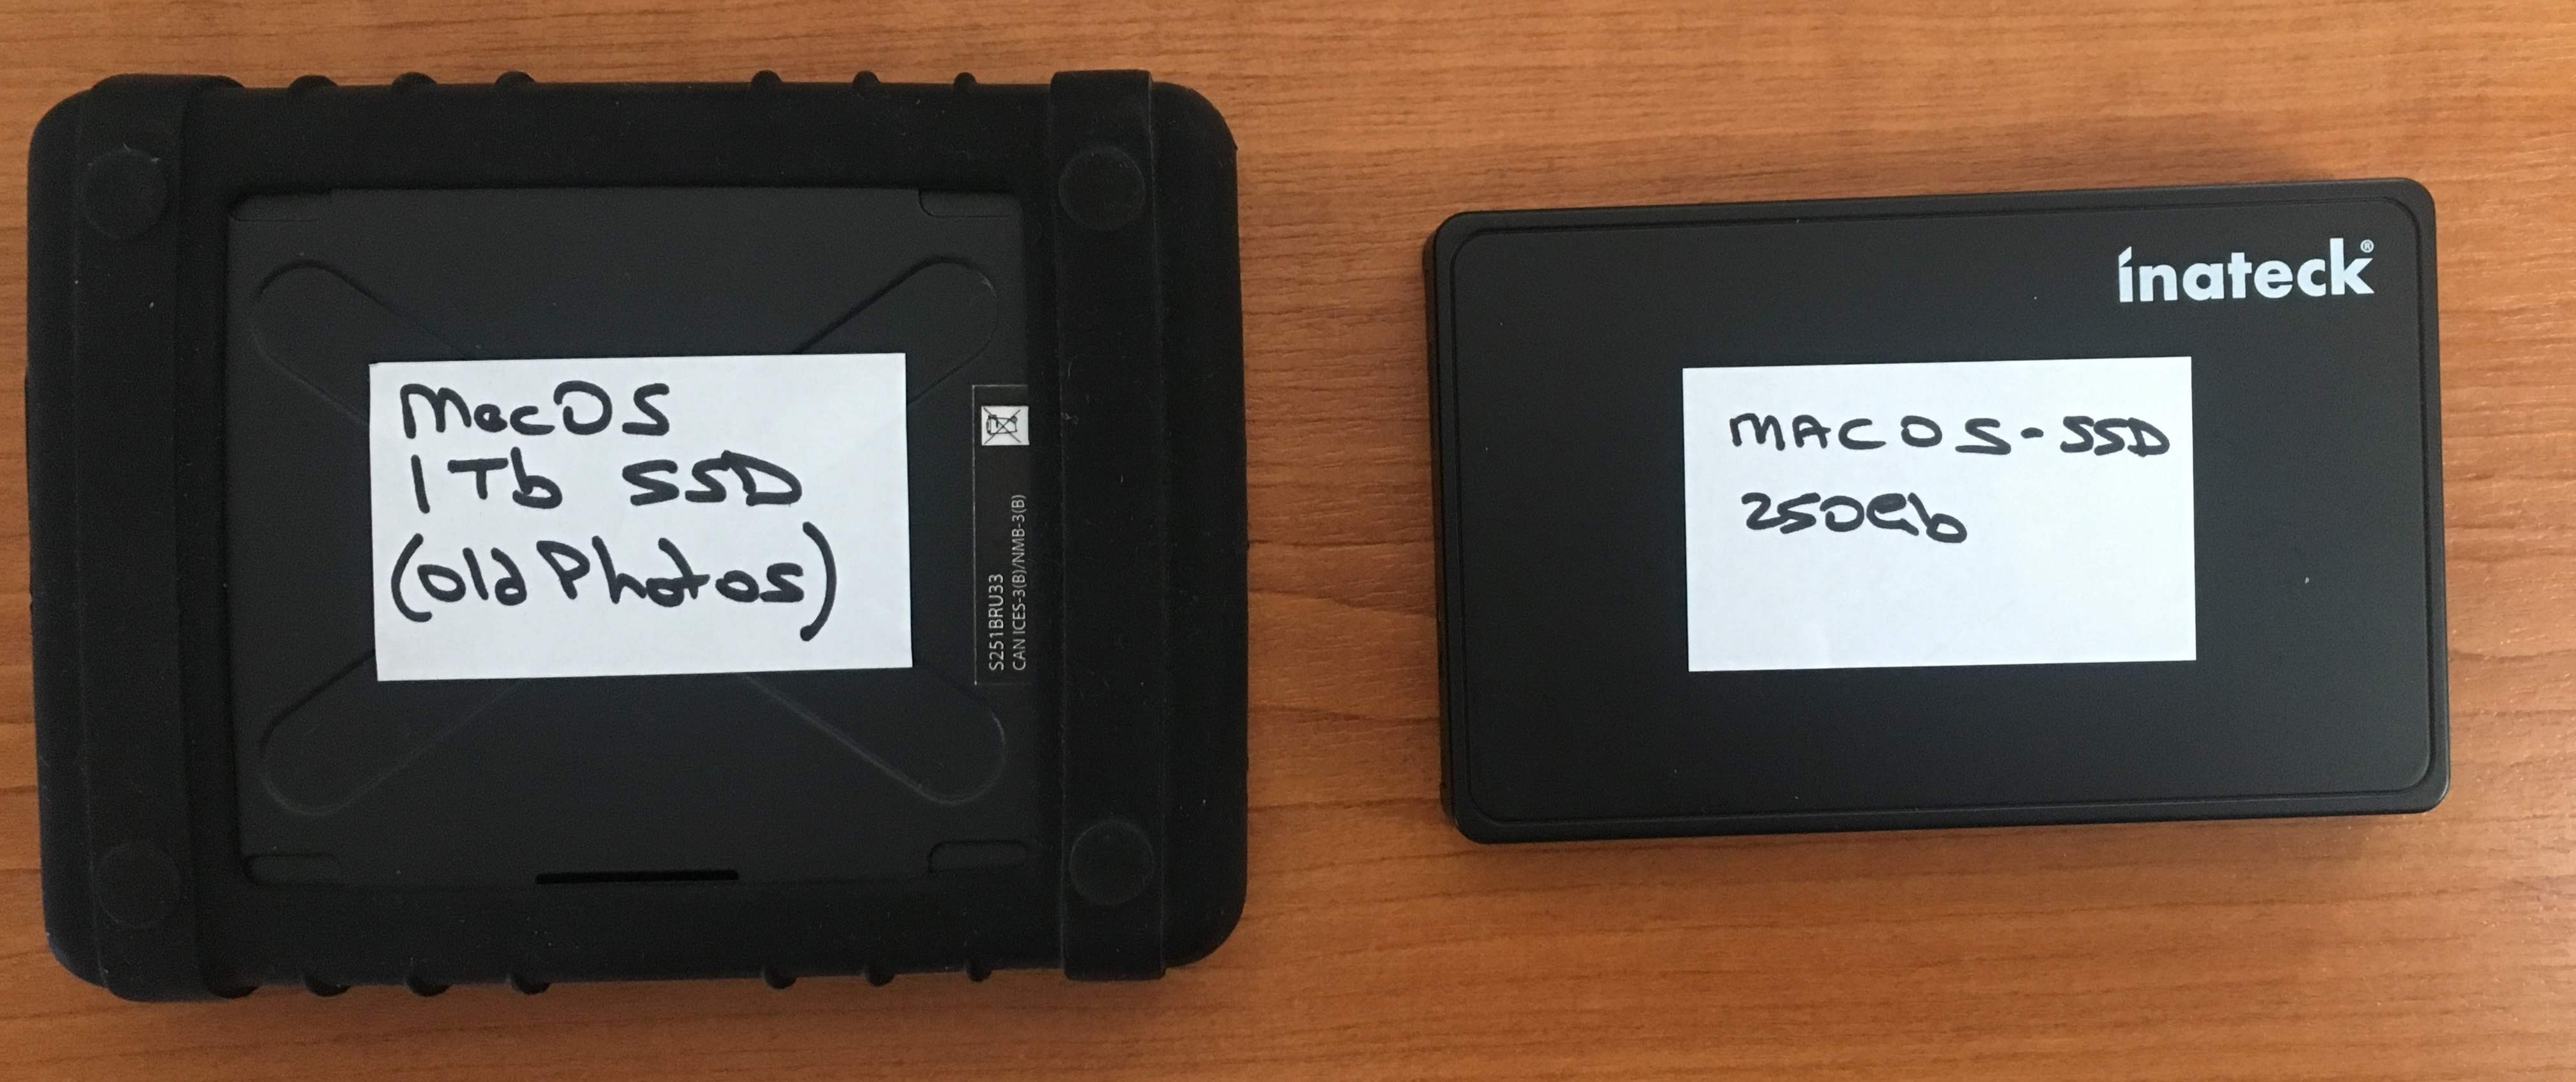
It’s not a drive for long-term storage though as 500Gb will probably not be sufficient for that purpose, I just use it for my annual storage of photos and catalog(s). You should therefore always look to other external hard disks for long-term storage and/or backup. I particularly like the Western Digital My Passport drives for this purpose. These need not be SSD however, as fast read/write is not necessary.

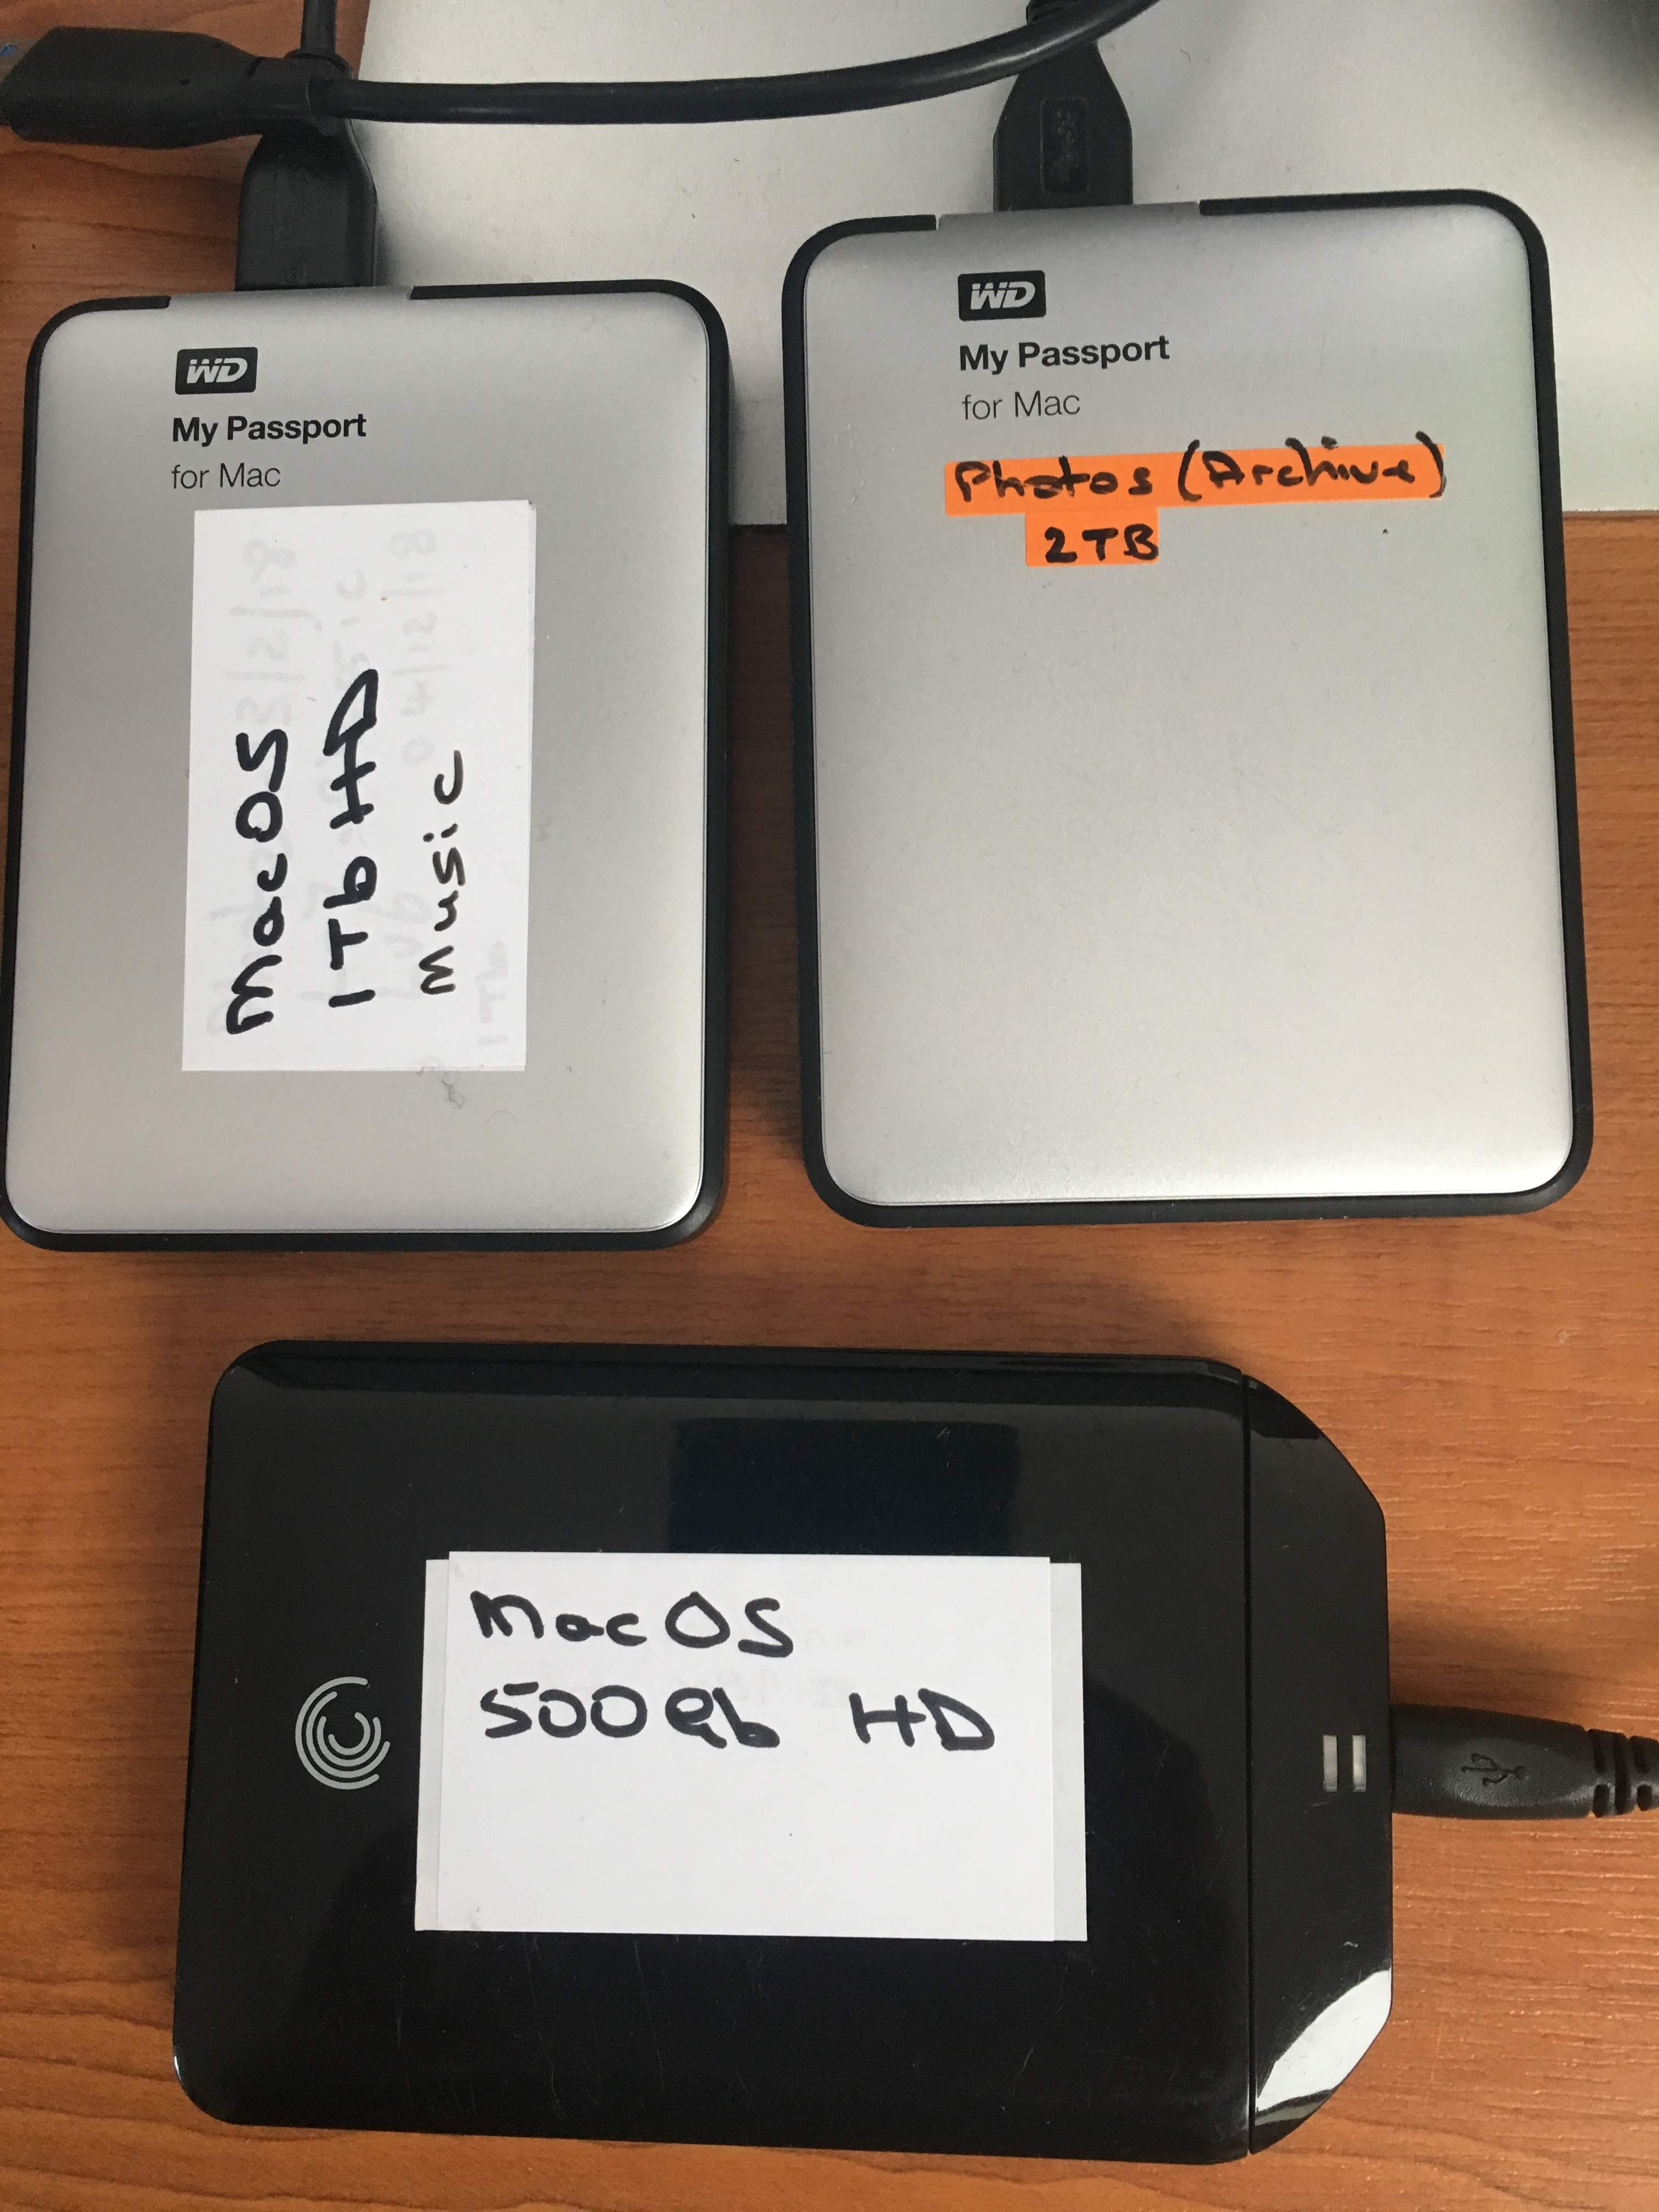
A selection of Western Digital and Seagate external HDD drives, useful for long-term, or archiving purposes.

You can also build your own external disks and I’ve done that using both rugged and non-rugged enclosures.

The one on the left is a rugged enclosure from StarTech, the other one uses an enclosure from inateck – both have Crucial SSD’s installed in them. This is a much cheaper way of getting an external SSD drive. I have had no problem with them apart from cable connections occasionally.

Please note that you must always also consider the equipment and operating systems that you want to be able to read/write to and from the disk. If you want to read and write on both MacOS and Windows equipment it’s advisable to consider formatting the disk using the ExFAT format if you’re using Apple equipment, rather than the native Apple formats. This will not be as efficient in terms of read/write operations, but you will get the benefit of better connectivity across equipment. [Note: I don’t use ExFAT other than on USB Stick Drives, as I almost exclusively use Apple equipment.]

Workflow, workflow every photographer needs a workflow

This is a subject I return to quite regularly, the last time being May, 2014. It’s an important subject because with digital photography you create many, many images, and if you’re not organised you’ll lose some images you want to keep or use, which can lead to unnecessary frustration and a lot of wasted time.

In the earlier post I detailed how I was using an external hard drive (a WD My Passport Slim) to store all Images and my main Lightroom Catalog. Nothing has changed here – the ability to swap between the MacBook Pro and the iMac for editing working off a single catalog and image store has been invaluable – the only modifications being:

  1. I always do a second copy of my imported images to a Folder on the Hard Disk of the Mac the external Hard Disk is attached to – on both systems this is Pictures > Lightroom Backup > Imports, and
  2. I always backup the Catalog on exit every time to Pictures > Lightroom Backup > Catalogs.

When I’m confident the external hard drive has been backed-up to Time Machine when it’s connected to the iMac, I delete the contents of the Lightroom Backup folder(s) on both systems.

I’ve also decided that I need some “off-site” backup as well, so periodically I ask for a disk, lodged with a neighbour, to be returned so that I can do a complete disk copy of the external hard disk.

I did consider using a cloud drive for the second copies, and the catalog backups, but with the size of the image files now being so large (a single RAW image from the A7r is over 30Mb) there was too much delay being introduced in sync’ing files to the Cloud. So, regretably I decided against that option.

However, an alternative could be to use a Wireless External Hard Drive such as the WD My Passport Wireless with it’s integral SD slot and use another connected Hard Disk to store the Second Copies / Catalog Backups to. I’m considering this option as I hinted in my post yesterday.

[It’s at this stage of the process that I would have liked to have considered using Lightroom Mobile to do the tagging and creation of collections, but my iPad is not up to the task, and the initial release of software didn’t allow me to do the tagging I wanted to do – this may have changed in later releases, I haven’t checked.]

So that’s the hardware part of the workflow sorted, what about the software? Well … Lightroom is very easily configured using Presets to store the images where you want them, to add keywords as you import the images and do certain adjustments (eg for lens, for camera, etc.). It really is important to tag (keyword), and label your images as you import them, so the next stage for me is absolutely vital.

I review every image in the Lightroom Library module and if I’m going to keep it because it has no flaw, I then rate it on a star basis by just typing 1, 2 , 3, 4 or 5, and I add any additional keywords to individual images. That done, I then create a Smart Collection of all the images rated at 3 to 5. This is the collection I then start reviewing in the Develop module.

[An aside mainly for non-Lightroom users. It is important to remember (in Lightroom) that all my non-deleted images are stored in folders (mine are by date) on the drive and that Collections are virtual “pointers” to the originals. Lightroom is a non-destructive photo-editing program. All changes to images are recorded in the Catalog, so you can always go back to any step of the process and move forward from there again – sometimes after creating a virtual copy of the image to store the state of the image before anymore changes are made.]

If, when editing, I consider the rating of the image should be changed, I do just that, which will cause an image to fall out of the Smart Collection. My objective here is to get a set of images rated 4, or 5 that I am going to do further work on. If there are a considerable number of images, I might set up another Smart Collection to reflect this.

Working on this collection I will then colour code the images red (6) – no further work will be done on the image, yellow (7) – work still to be done on the image, or green (8) – finished image,  to indicate where the image has got in the post-processing.

This workflow and image categorisation has served me well in identifying images to be uploaded to Blurb for Photobooks, or for images that might be printed.

That’s where I am this May, I wonder what I’ll be doing next May :-).